Day-1 Live Demo-2: React JS, Webpack, Babel
- Day-1, Second Live Demo: React + Webpack + Babel Setup
App Name: react-app-webpack-babel
Pre-requisites: Node JS, Node Package Manager
Step-1: Create project directory In your terminal type:
mkdir react-app-webpack-babel
cd react-app-webpack-babel
npm init -y
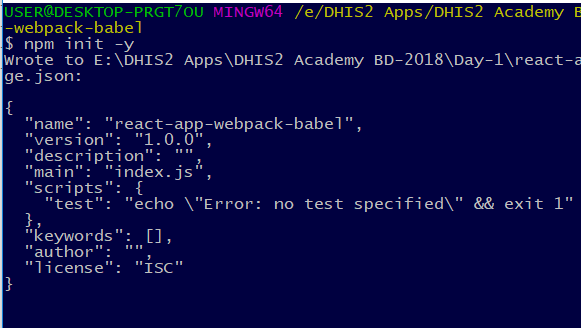
The last command should have generated a package.json file. The -y indicates that all default configurations should be used. In the package.json file you will find configurations, installed node packages and scripts later on.
In package.json file:
{
  "name": "react-app-webpack-babel",
  "version": "1.0.0",
  "description": "",
  "main": "index.js",
  "scripts": {
    "test": "echo \"Error: no test specified\" && exit 1"
  },
  "keywords": [],
  "author": "",
  "license": "ISC"
}
Step-2: From root folder (minimal-react-boilerplate):
touch index.html
Add the below code in this HTML file:
React-App-Webpack-Babel
Step-3: Webpack Setup
You will use Webpack as module bundler and build tool. Moreover you will use webpack-dev-server to serve your bundled app in a local environment. Otherwise you couldn’t see it in the browser to develop it. Last but not least, you need the webpack-cli node package to configure your Webpack setup in a configuration file later on. Let’s install all three node packages by using npm.
From root folder:npm install --save-dev webpack@3.11.0After installation of Webpack:

npm install --save-dev webpack-dev-server@2.11.1
npm install --save-dev webpack-cli@2.0.14
"scripts": {
    "build": "webpack",
    "start": "webpack-dev-server"
  },
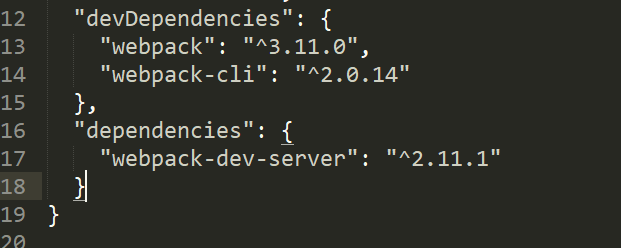
Now the final package.json file:
{
  "name": "react-app-webpack-babel",
  "version": "1.0.0",
  "description": "",
  "main": "index.js",
  "scripts": {
    "build": "webpack",
    "start": "webpack-dev-server"
  },
  "keywords": [],
  "author": "",
  "license": "ISC",
  "devDependencies": {
    "webpack": "^3.11.0",
    "webpack-cli": "^2.0.14"
  },
  "dependencies": {
    "webpack-dev-server": "^2.11.1"
  }
}
The script defines that you want to use the webpack-dev-server with a configuration file called wepback.config.js.
Step-4: Let’s create the required wepback.config.js file. From root folder:
touch webpack.config.jsAdd the below code:
'use strict';
var webpack = require('webpack');
const webpackConfig = {
    context: __dirname,
    entry: './src/app.js',
    output: {
        path: __dirname + '/build',
        filename: 'app.js',
        publicPath: 'http://localhost:8081/'
    },
    "mode":"development",
    module: {
        rules: [
            {
                test: /\.jsx?$/,
                exclude: /node_modules/,
                loader: 'babel-loader',
                query: {
                    presets: ['es2017', 'stage-2', 'react'],
                },
            }
        ],
    },
    devServer: {
        port: 8081,
        inline: true,
        compress: true,
    }
};

module.exports = webpackConfig;
Step-5: Create .babelrc file in root:
touch .babelrcAdd the below code:
{
	"presets":
	["es2017", "react", "stage-1"]
}
Step-6: Create new directory src/app.js
mkdir src
cd src
touch app.js
Add the below code in the app.js file:
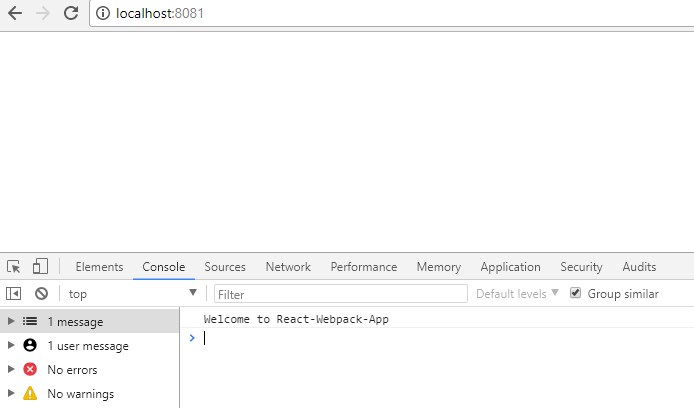
console.log("Welcome to React-Webpack-App");
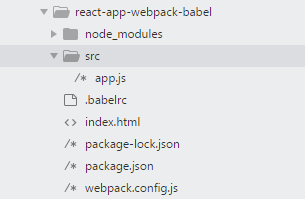
Now the entire directory structure is:
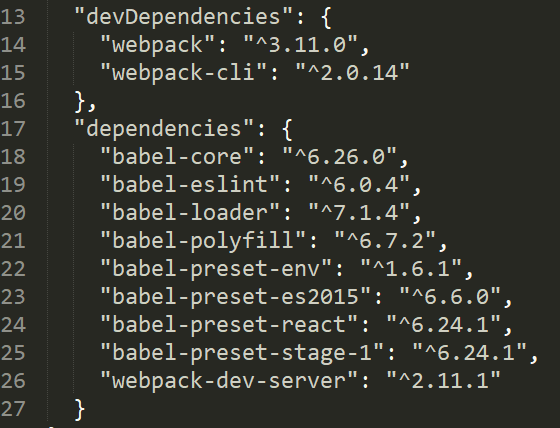
Babel enables you writing your code in ES6 (ES2015). With Babel the code will get transpiled back to ES5 so that every browser, without having all ES6 features implemented, can interpret it. Babel even takes it one step further. You can not only use ES6 features, but also the next generations of ES.
npm install --save babel-eslint@6.0.4
npm install --save babel-polyfill@6.7.2
npm install --save babel-preset-es2017
npm install --save babel-core@6.26.0
npm install --save babel-loader@7.1.4
npm install --save babel-preset-env@1.6.1
npm install --save babel-preset-react@6.24.1
npm i babel-preset-stage-2
In order to use React, you need two more node packages. The react and react-dom packages should fix your npm start.
From root folder:npm install react npm install react-domStep-9: Run the app and see the result from console:
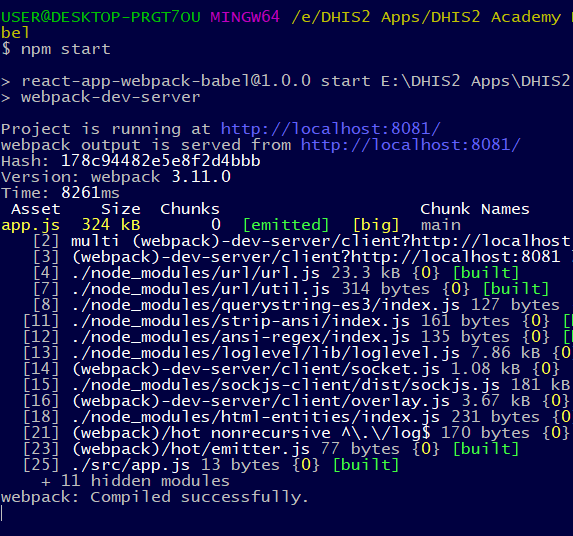
npm start
Goto browser and type: http://localhost:8081
check the output from browser:
Now you can add the below code:
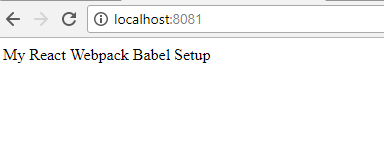
import React from 'react'; import ReactDOM from 'react-dom'; const title = 'My React Webpack Babel Setup'; ReactDOM.render( div{title}/div, document.getElementById('app') );Add the below plugins in webpack for error handling:plugins:[ new webpack.HotModuleReplacementPlugin(), new webpack.NoEmitOnErrorsPlugin() ]
Restart npm and check the output in browser:
- Day-1, Second Live Demo: React + Webpack + Babel Setup
App Name: react-app-webpack-babel
Pre-requisites: Node JS, Node Package Manager
Step-1: Create project directory In your terminal type:
mkdir react-app-webpack-babel
cd react-app-webpack-babel
npm init -y
The last command should have generated a package.json file. The -y indicates that all default configurations should be used. In the package.json file you will find configurations, installed node packages and scripts later on.
In package.json file:
{
  "name": "react-app-webpack-babel",
  "version": "1.0.0",
  "description": "",
  "main": "index.js",
  "scripts": {
    "test": "echo \"Error: no test specified\" && exit 1"
  },
  "keywords": [],
  "author": "",
  "license": "ISC"
}
Step-2: From root folder (minimal-react-boilerplate):
touch index.html
Add the below code in this HTML file:
React-App-Webpack-Babel
Step-3: Webpack Setup
You will use Webpack as module bundler and build tool. Moreover you will use webpack-dev-server to serve your bundled app in a local environment. Otherwise you couldn’t see it in the browser to develop it. Last but not least, you need the webpack-cli node package to configure your Webpack setup in a configuration file later on. Let’s install all three node packages by using npm.
From root folder:npm install --save-dev webpack@3.11.0After installation of Webpack:
npm install --save-dev webpack-dev-server@2.11.1
npm install --save-dev webpack-cli@2.0.14
"scripts": {
    "build": "webpack",
    "start": "webpack-dev-server"
  },
Now the final package.json file:
{
  "name": "react-app-webpack-babel",
  "version": "1.0.0",
  "description": "",
  "main": "index.js",
  "scripts": {
    "build": "webpack",
    "start": "webpack-dev-server"
  },
  "keywords": [],
  "author": "",
  "license": "ISC",
  "devDependencies": {
    "webpack": "^3.11.0",
    "webpack-cli": "^2.0.14"
  },
  "dependencies": {
    "webpack-dev-server": "^2.11.1"
  }
}
The script defines that you want to use the webpack-dev-server with a configuration file called wepback.config.js.
Step-4: Let’s create the required wepback.config.js file. From root folder:
touch webpack.config.jsAdd the below code:
'use strict';
var webpack = require('webpack');
const webpackConfig = {
    context: __dirname,
    entry: './src/app.js',
    output: {
        path: __dirname + '/build',
        filename: 'app.js',
        publicPath: 'http://localhost:8081/'
    },
    "mode":"development",
    module: {
        rules: [
            {
                test: /\.jsx?$/,
                exclude: /node_modules/,
                loader: 'babel-loader',
                query: {
                    presets: ['es2017', 'stage-2', 'react'],
                },
            }
        ],
    },
    devServer: {
        port: 8081,
        inline: true,
        compress: true,
    }
};

module.exports = webpackConfig;
Step-5: Create .babelrc file in root:
touch .babelrcAdd the below code:
{
	"presets":
	["es2017", "react", "stage-1"]
}
Step-6: Create new directory src/app.js
mkdir src
cd src
touch app.js
Add the below code in the app.js file:
console.log("Welcome to React-Webpack-App");
Now the entire directory structure is:
Babel enables you writing your code in ES6 (ES2015). With Babel the code will get transpiled back to ES5 so that every browser, without having all ES6 features implemented, can interpret it. Babel even takes it one step further. You can not only use ES6 features, but also the next generations of ES.
npm install --save babel-eslint@6.0.4
npm install --save babel-polyfill@6.7.2
npm install --save babel-preset-es2017
npm install --save babel-core@6.26.0
npm install --save babel-loader@7.1.4
npm install --save babel-preset-env@1.6.1
npm install --save babel-preset-react@6.24.1
npm i babel-preset-stage-2
In order to use React, you need two more node packages. The react and react-dom packages should fix your npm start.
From root folder:npm install react npm install react-domStep-9: Run the app and see the result from console:
npm start
Goto browser and type: http://localhost:8081
check the output from browser:
Now you can add the below code:
import React from 'react'; import ReactDOM from 'react-dom'; const title = 'My React Webpack Babel Setup'; ReactDOM.render( div{title}/div, document.getElementById('app') );Add the below plugins in webpack for error handling:plugins:[ new webpack.HotModuleReplacementPlugin(), new webpack.NoEmitOnErrorsPlugin() ]
Restart npm and check the output in browser: