DHIS2 installation in Amazon Elastic Compute Cloud (AWS-EC2) Server
Outline
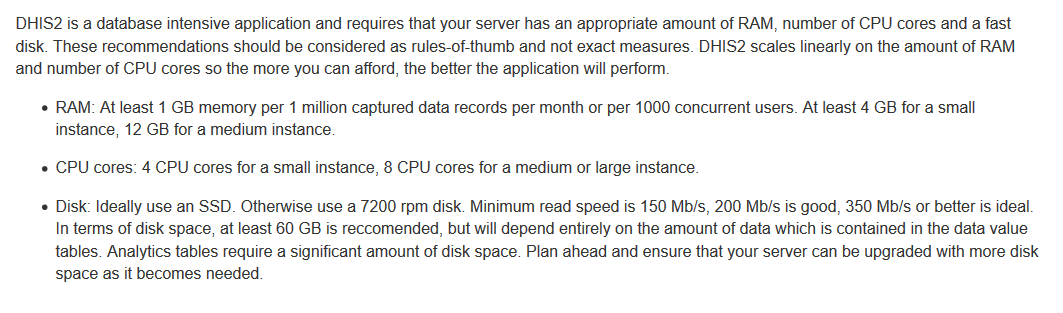
Server specifications:
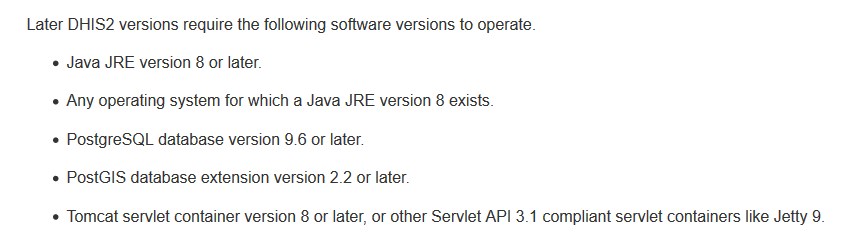
Software requirements:
See detail:
https://docs.dhis2.org/master/en/implementer/html/dhis2_implementation_guide_full.html#installationCreate an account in Amazone AWS. Also, you can try with free EC2. For free, you need to add your credit card and they will charge $1 which is for verifying your information. This $1 is refundable.
See detail:
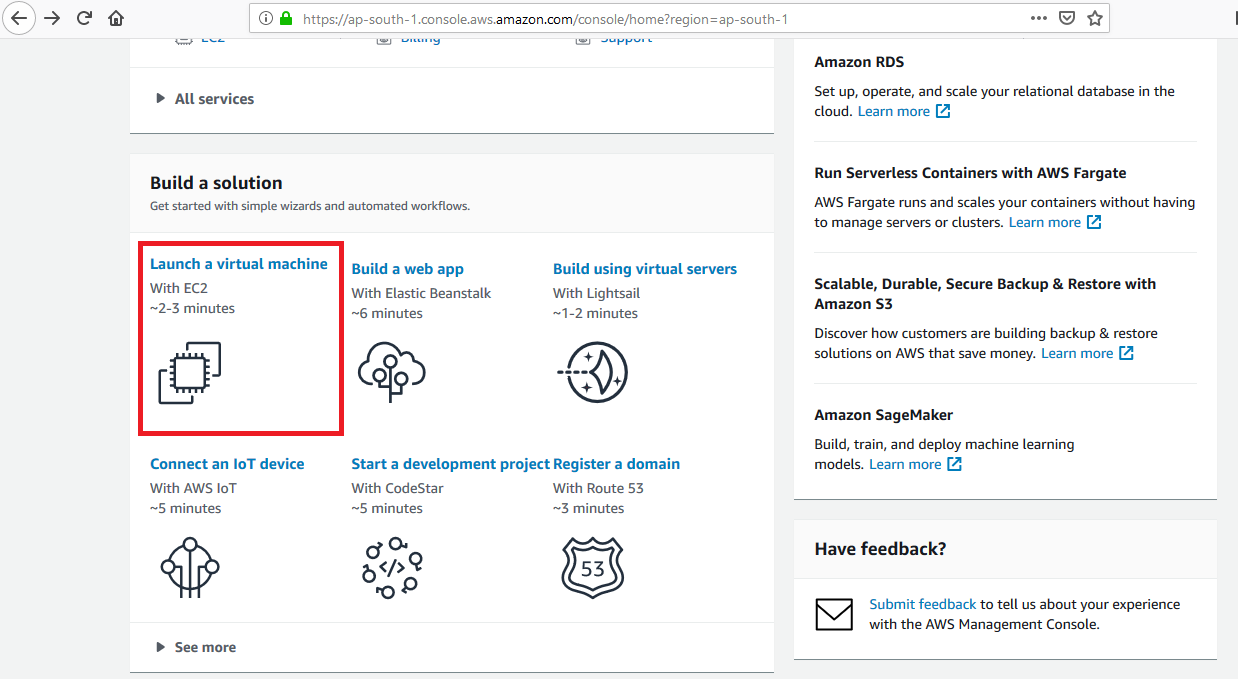
https://ap-southeast-1.console.aws.amazon.com3.1 Launch virtual machine

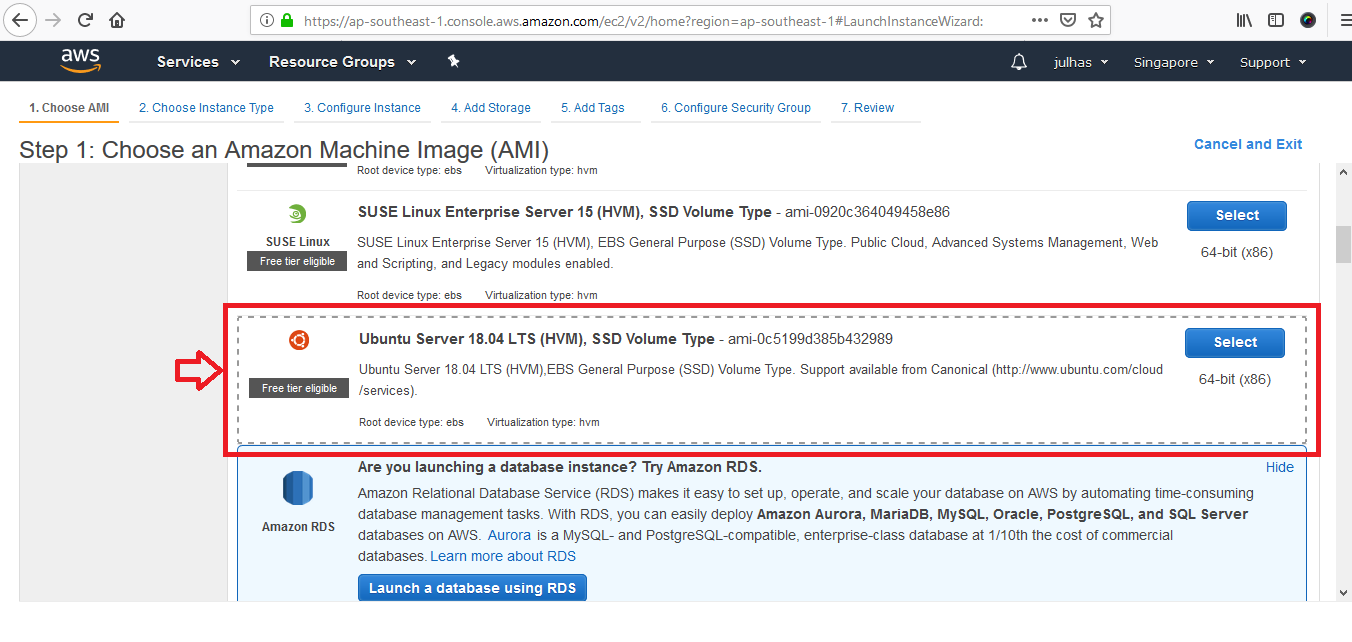
3.2 Choose an Amazone Machine Image (AMI):
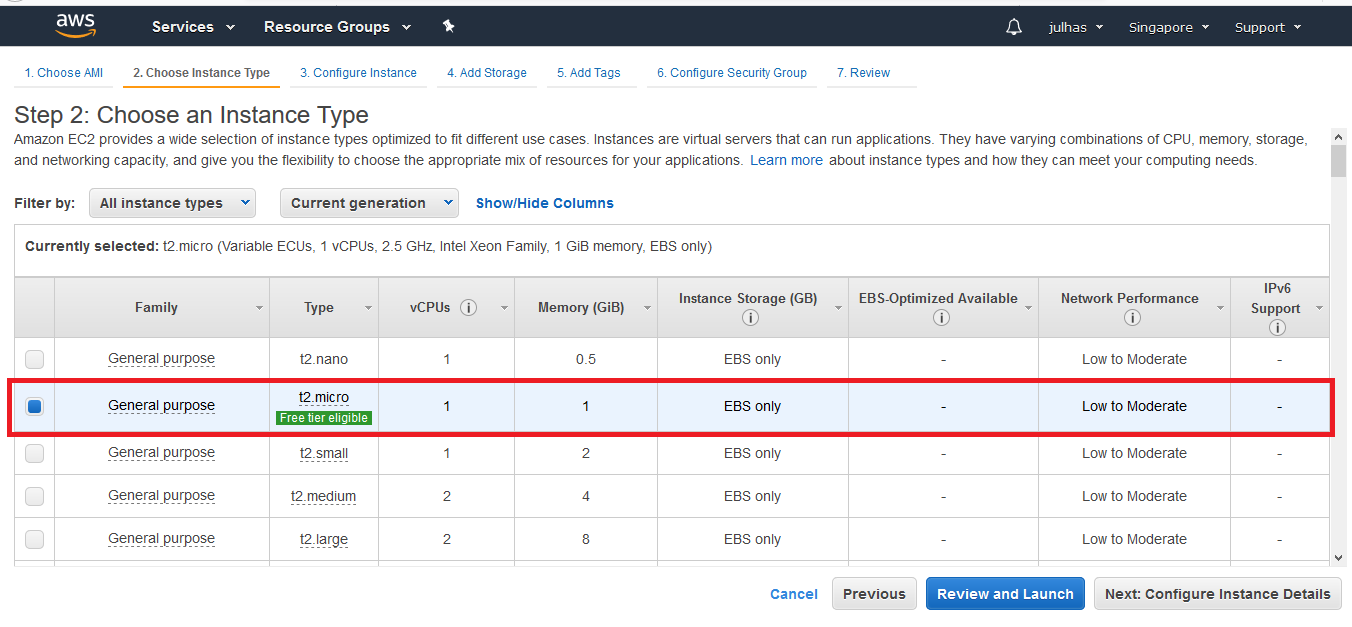
3.3 Choose an Instance Type:
3.4 Configure Instance Details:
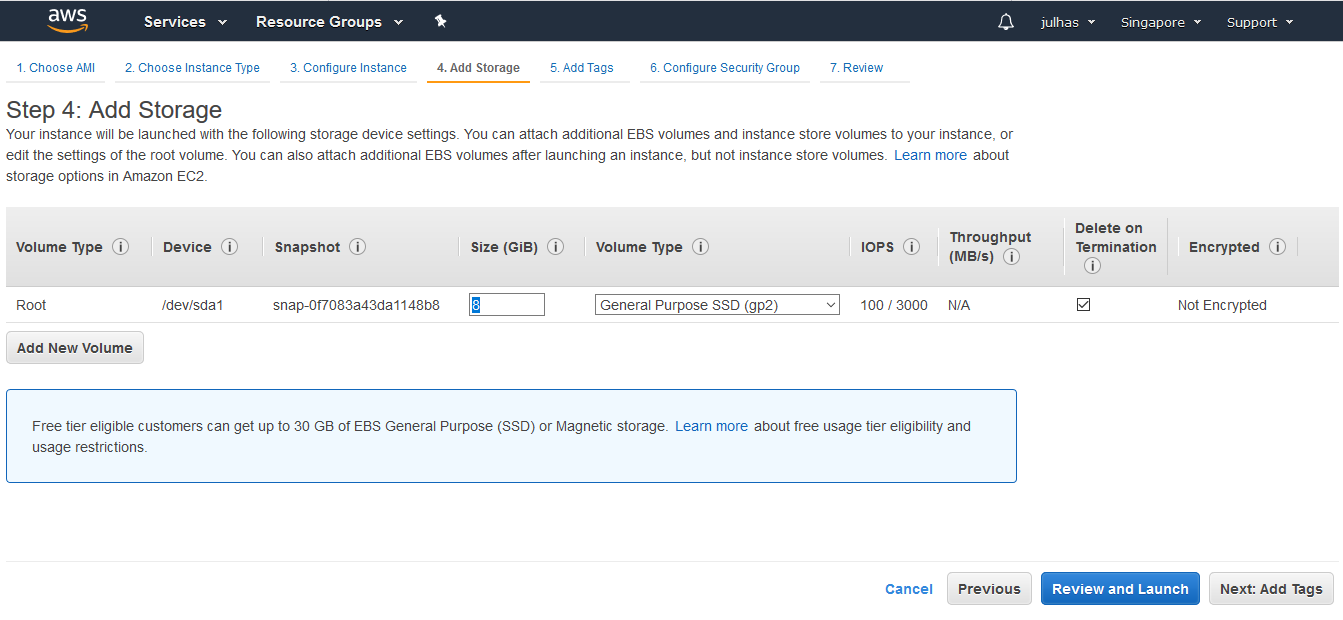
3.5 Add storage:
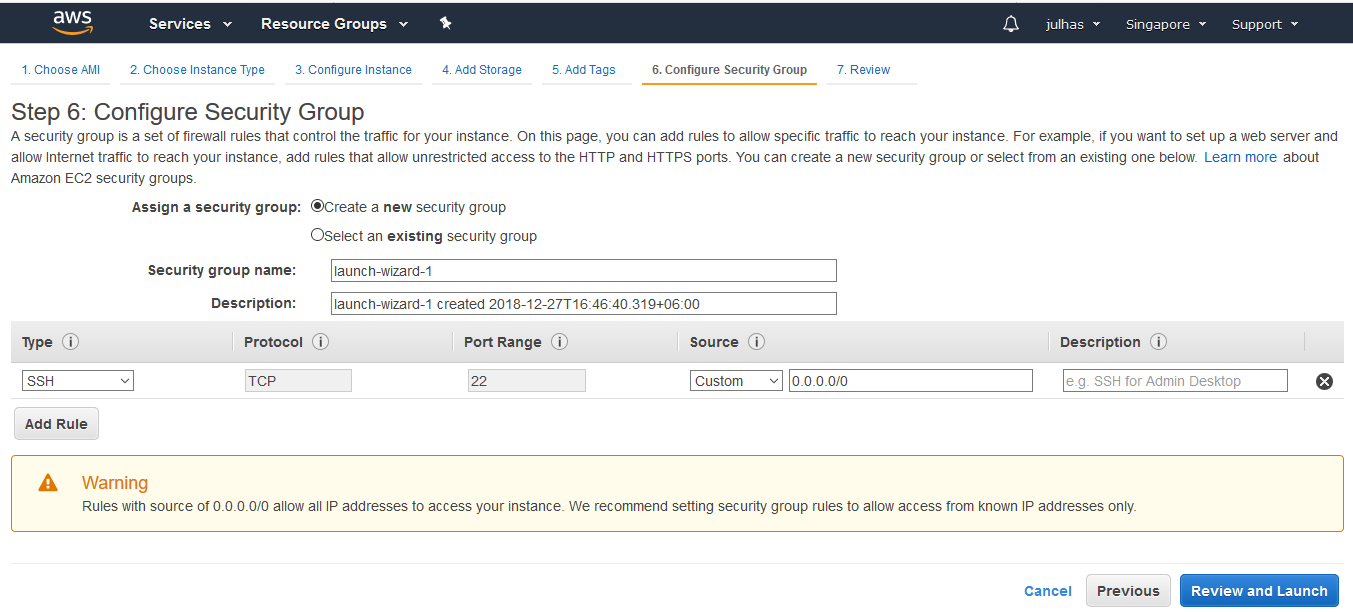
3.6 Configure Security Group:
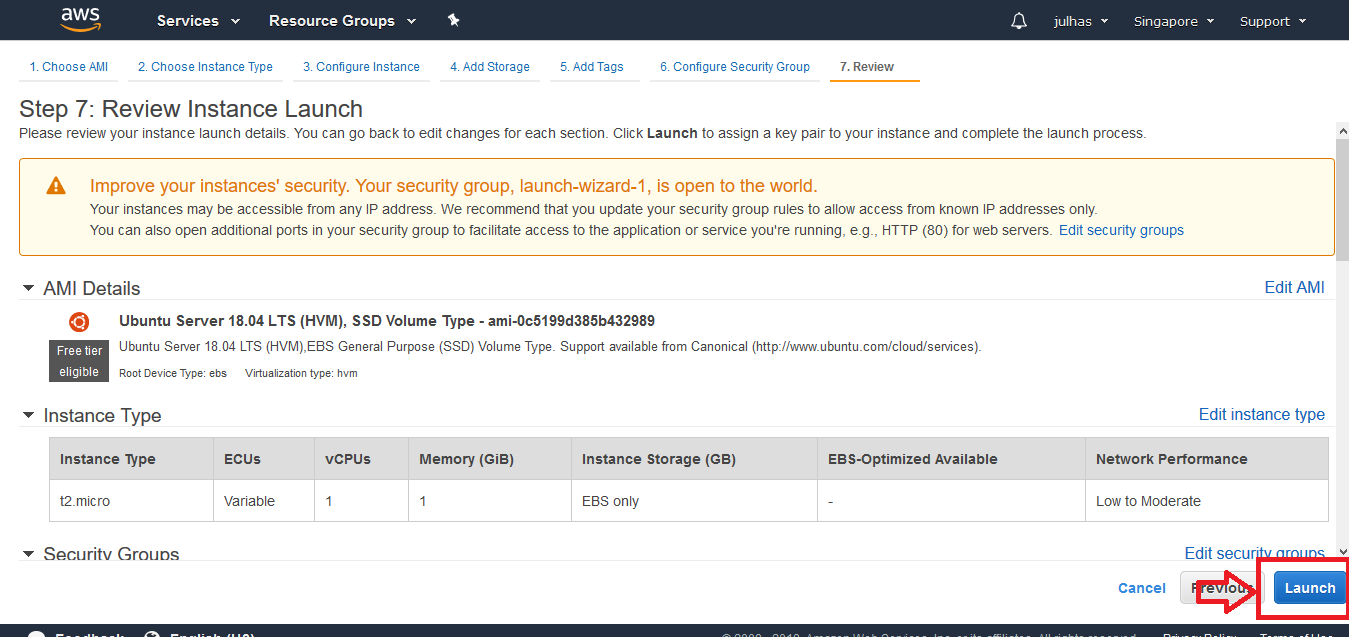
3.7 Review Instance Launch:
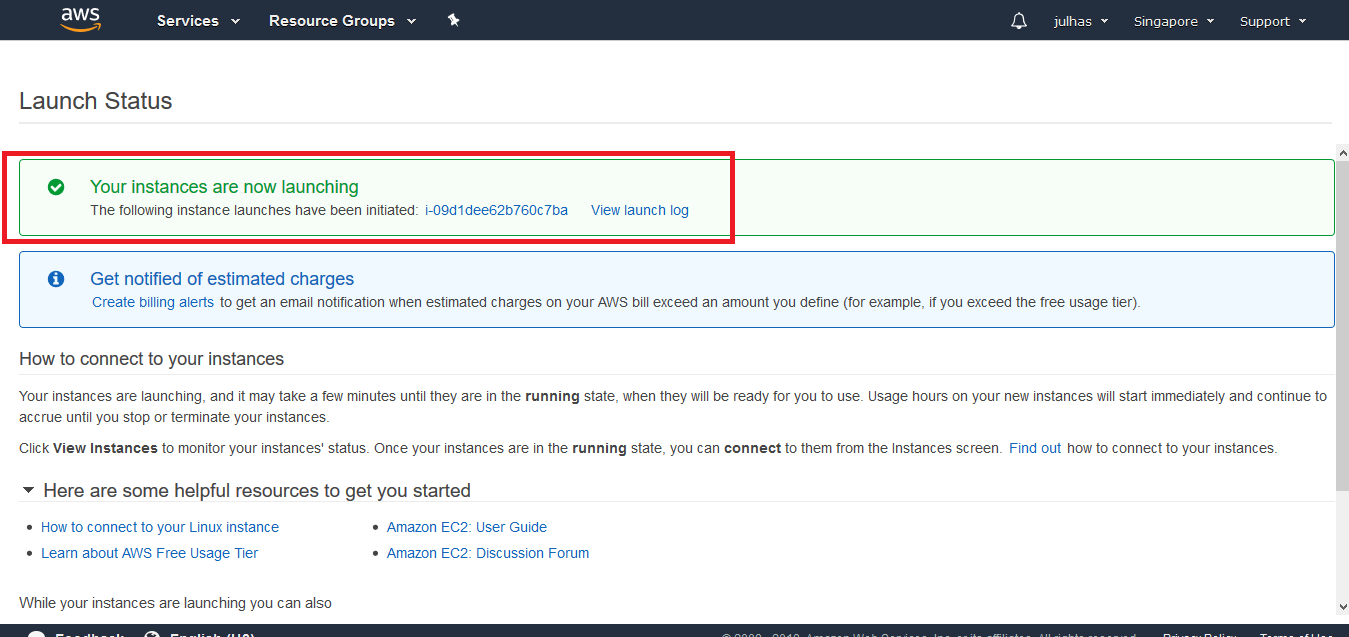
3.8 EC2 Launching Status:
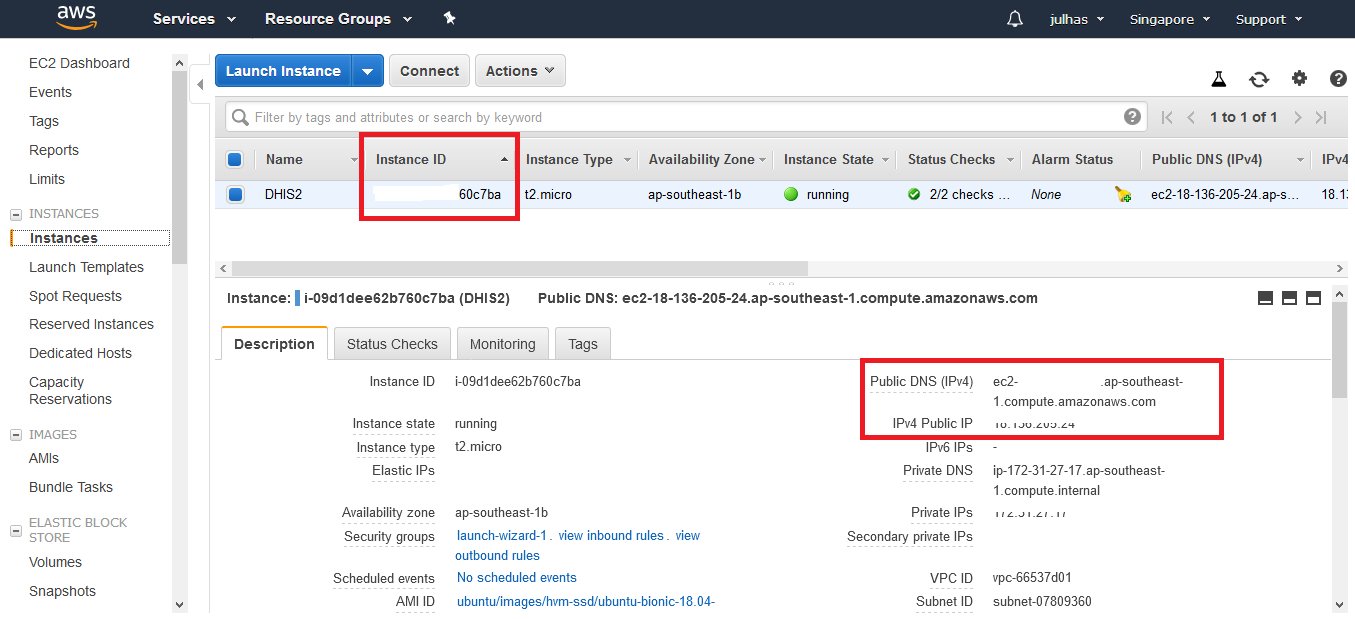
3.9 Launched Instance:
4.1 Connect your Linux instance:
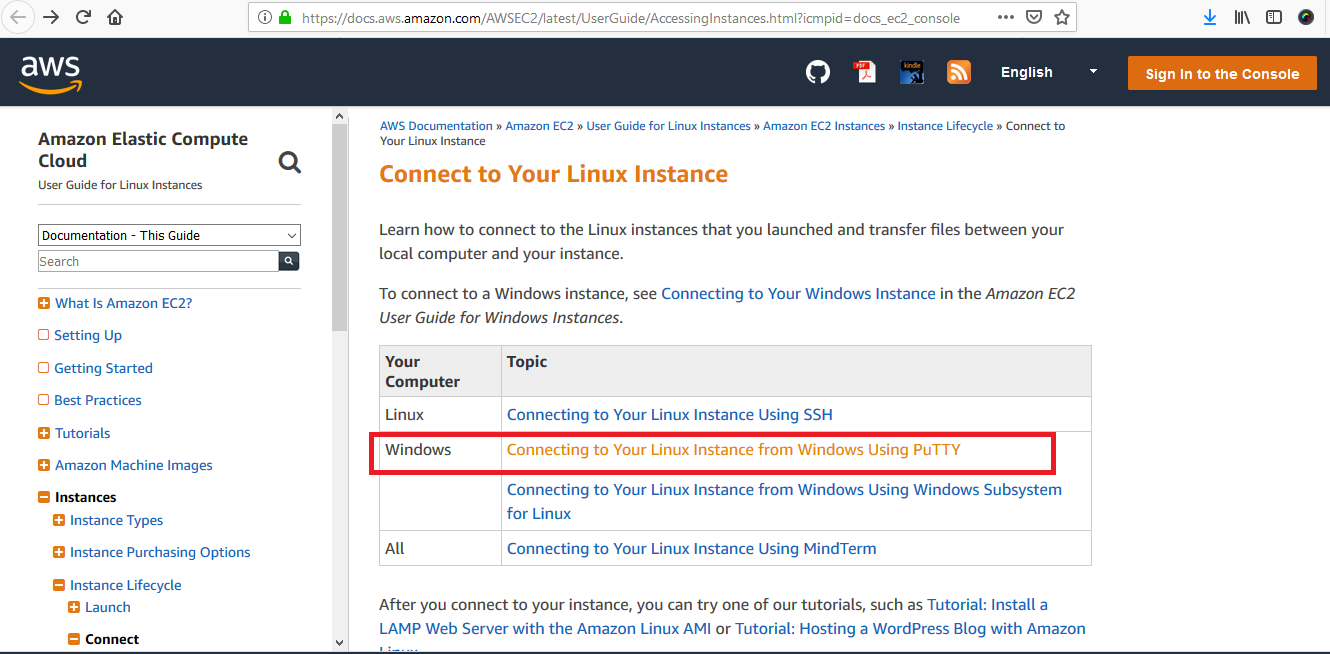
4.2 Connect your linux instance from windows using putty:
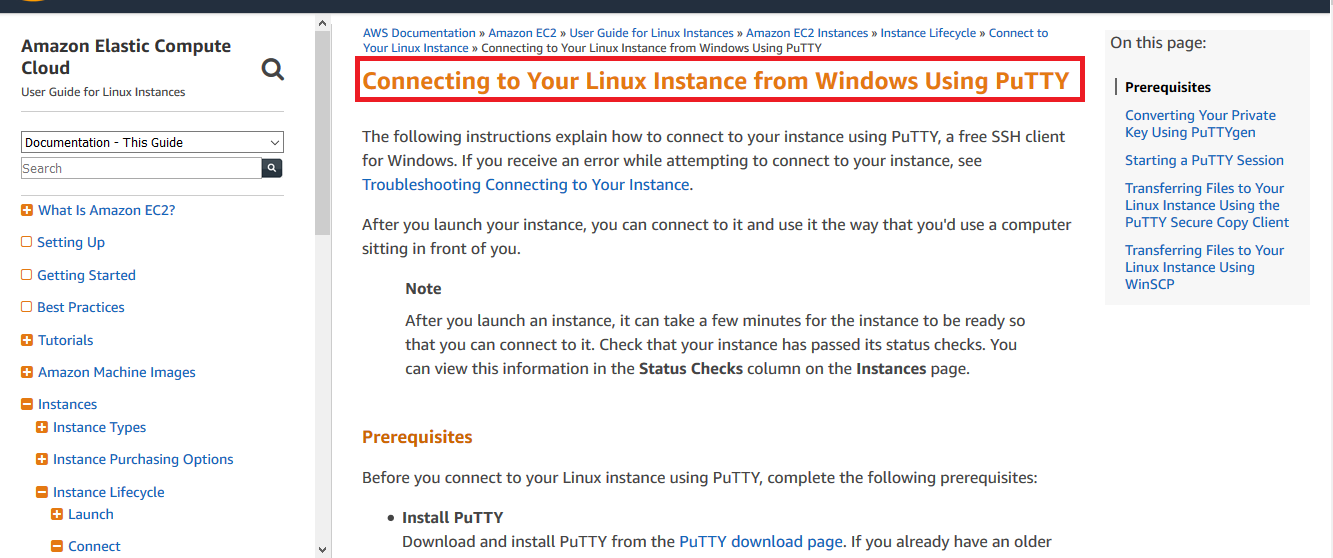
Follow the below guidance:
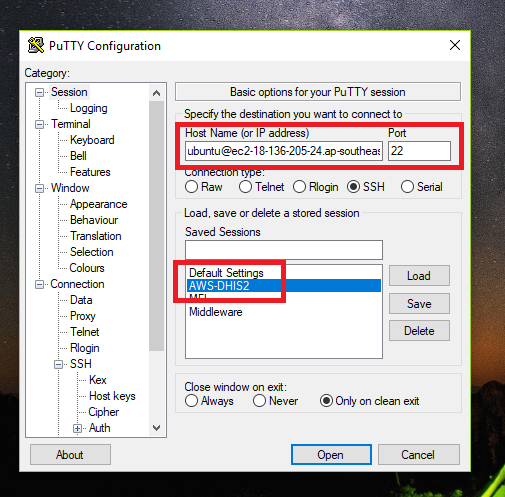
https://docs.aws.amazon.com/AWSEC2/latest/UserGuide/putty.html4.3 In putty add the host name with default port 22
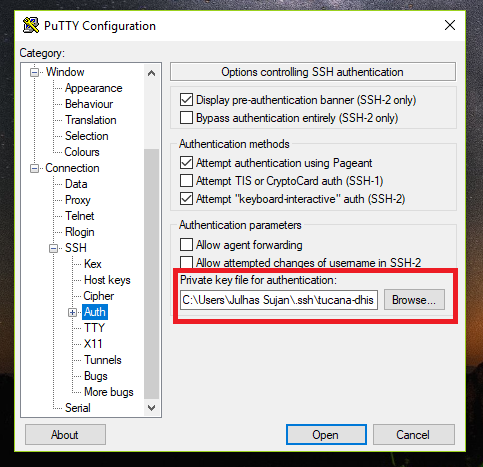
4.4 Under connection>> Click on Auth and load your private key that you have already generated by puttygen and finally click on the “Open” button:
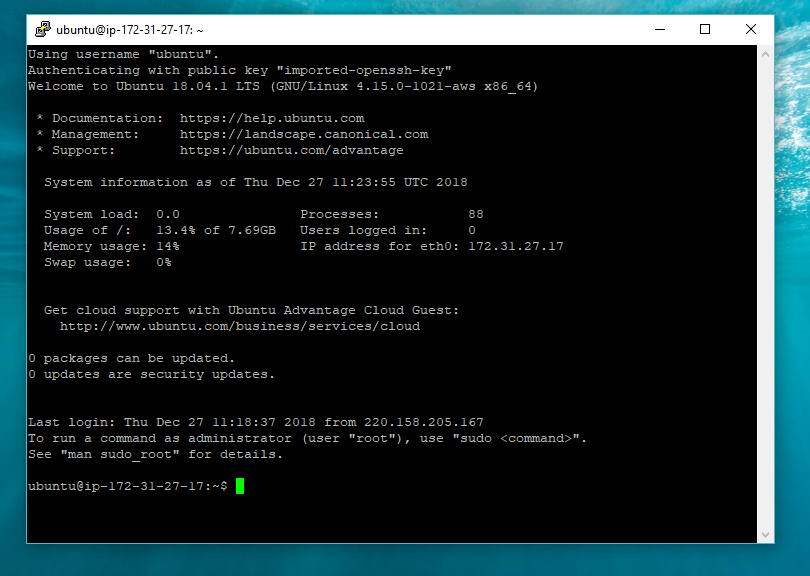
4.5 See the terminal :
4.6 Login using Win-SCP: open your winscp and follow the below steps
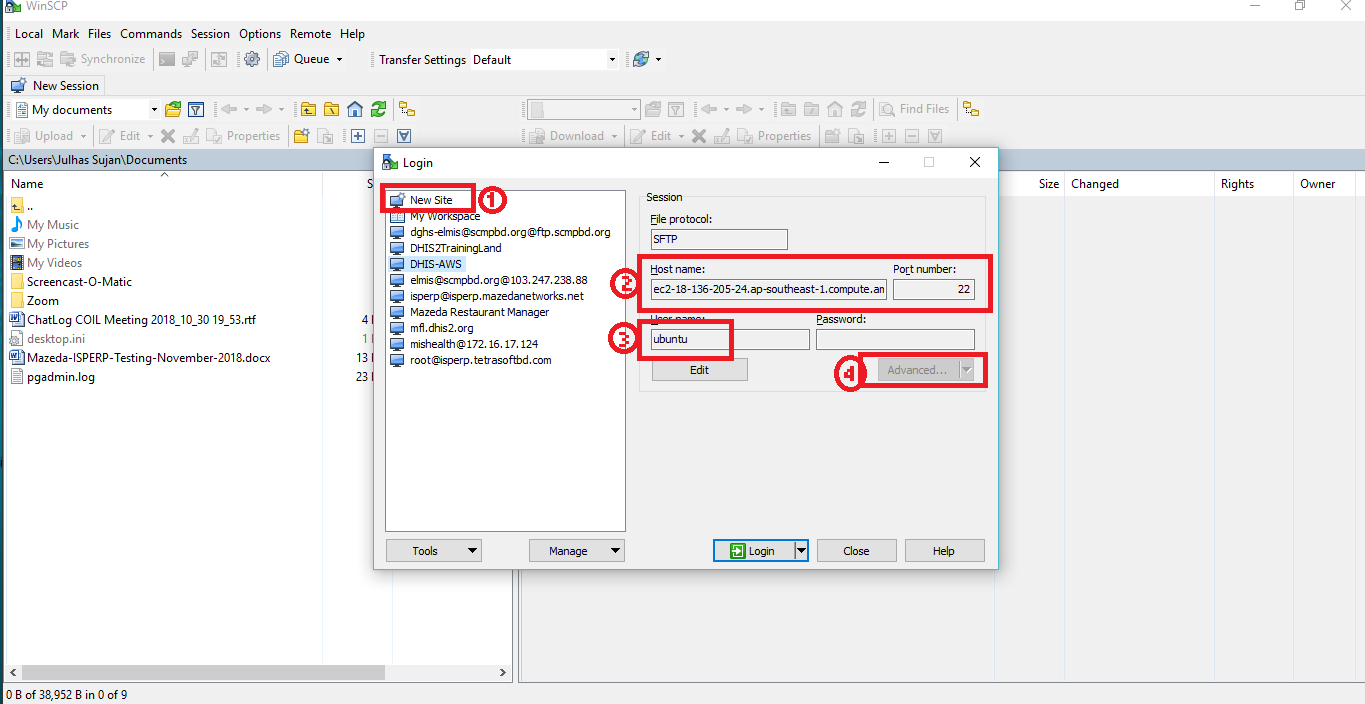
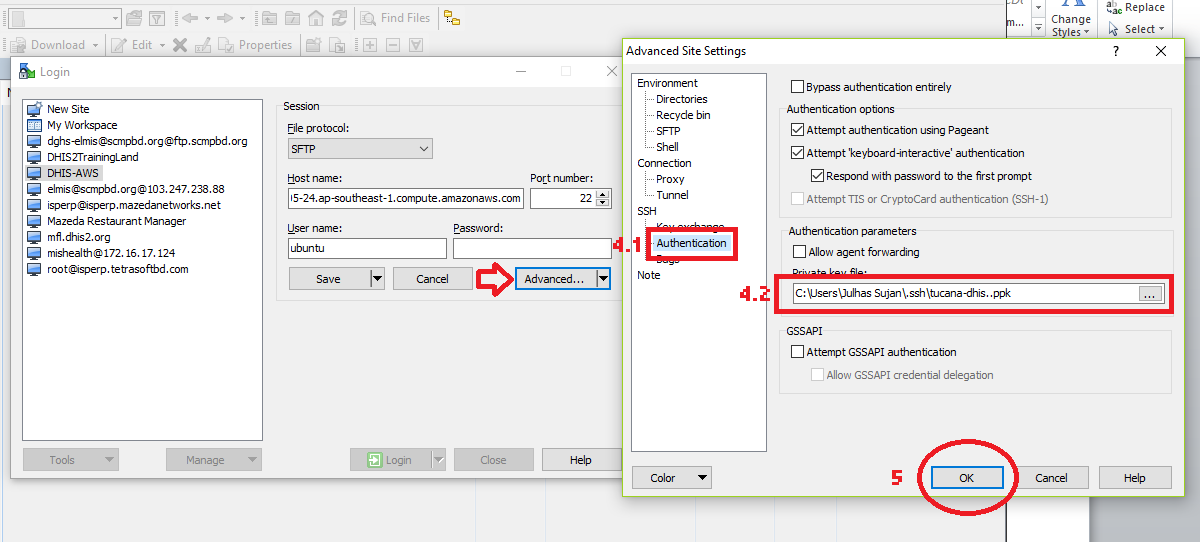
4.7 Advanced settings in win-scp:
4.8 After login in win-scp:

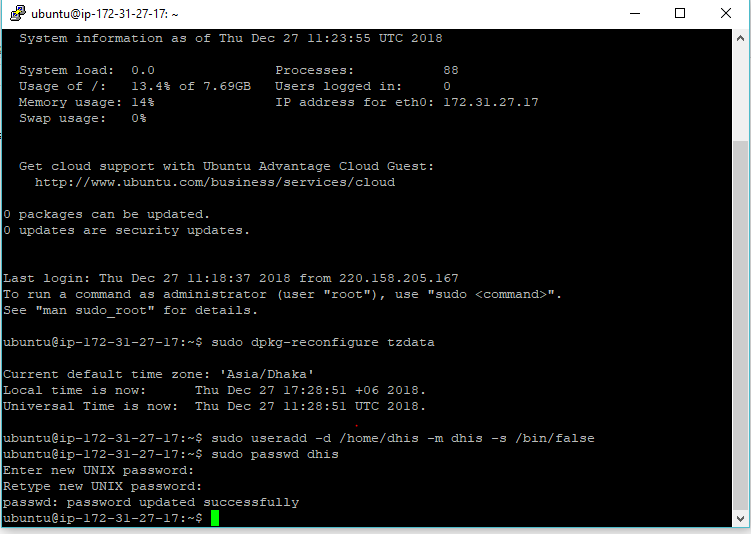
5.1 Creating a user to run DHIS2:
You should create a dedicated user for running DHIS2. Under no circumstances, should you run the DHIS2 server as a privileged user such as root. Create a new user called dhis by invoking:sudo useradd -d /home/dhis -m dhis -s /bin/false
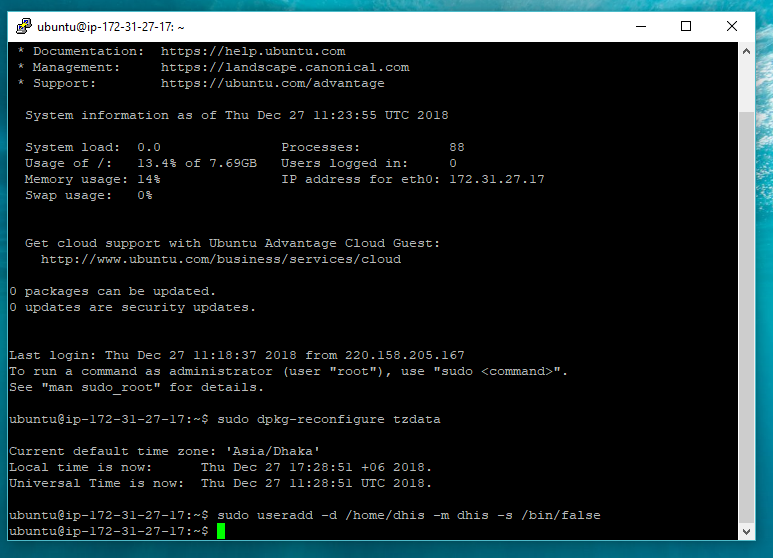
sudo passwd dhis
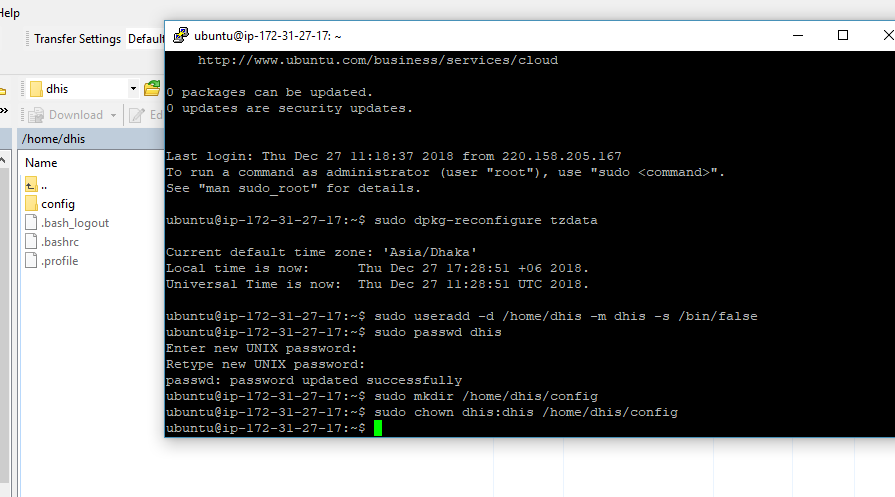
5.2 Creating the configuration directory :
Start by creating a suitable directory for the DHIS2 configuration files. This directory will also be used for apps, files and log files. An example directory could be:
mkdir /home/dhis/config
chown dhis:dhis /home/dhis/config
5.3 Setting server time zone and locale
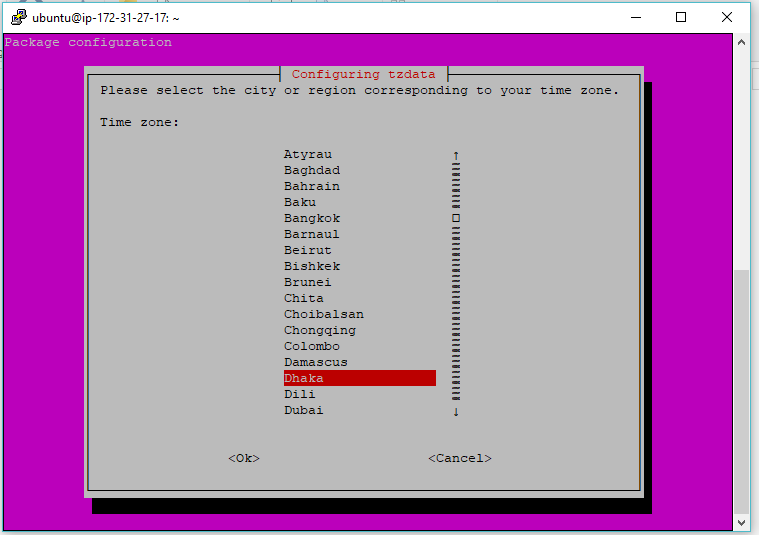
It may be necessary to reconfigure the time zone of the server to match the time zone of the location which the DHIS2 server will be covering. If you are using a virtual private server, the default time zone may not correspond to the time zone of your DHIS2 location. You can easily reconfigure the time zone by invoking the below and following the instructions.sudo dpkg-reconfigure tzdata
5.4 PostgreSQL installation:
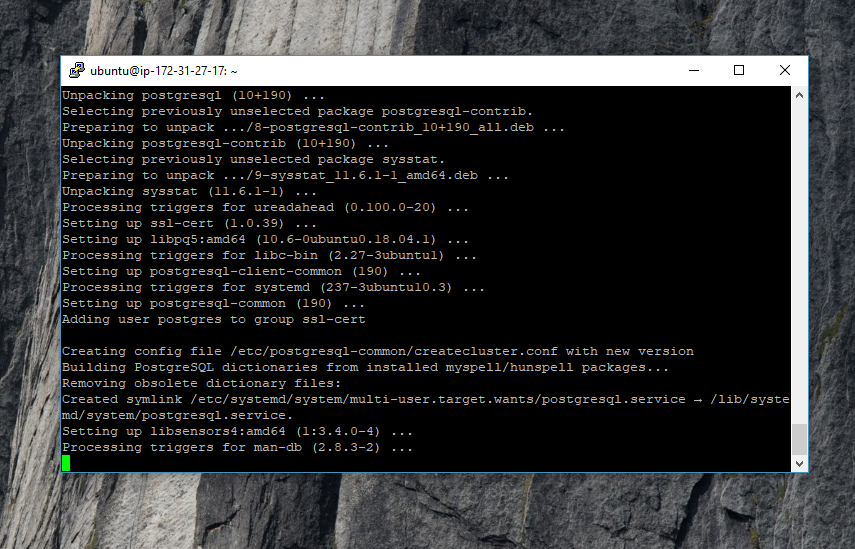
Install PostgreSQL by invoking:sudo apt-get update sudo apt-get install postgresql postgresql-contrib
See detail:
https://www.digitalocean.com/community/tutorials/how-to-install-and-use-postgresql-on-ubuntu-16-045.5 Install Postgis:
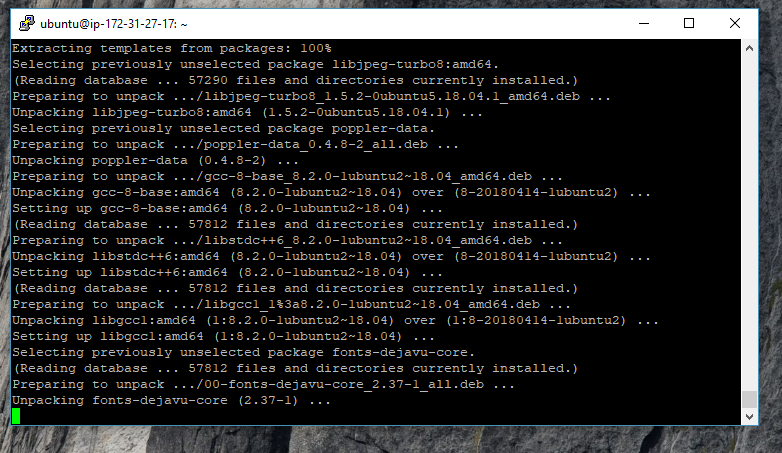
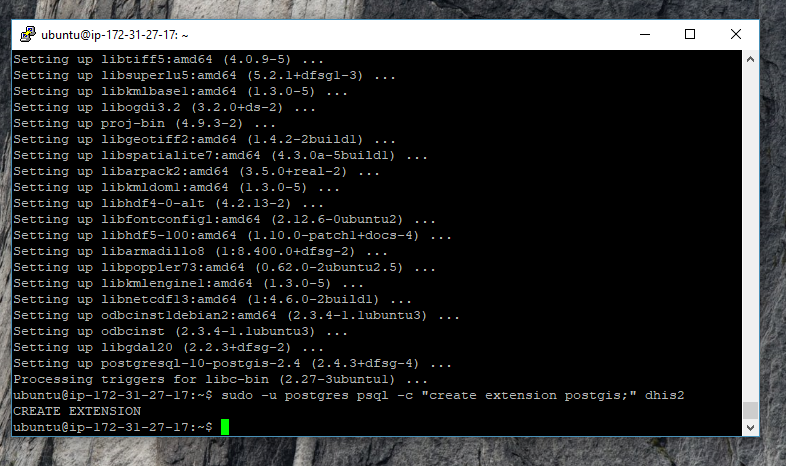
sudo apt-get install postgresql-10-postgis-2.4
Source:
https://packages.ubuntu.com/bionic/postgresql-10-postgis-2.4Create a non-privileged user called dhis by invoking: sudo -u postgres createuser -SDRP dhis Enter a secure password at the prompt. Create a database by invoking: sudo -u postgres createdb -O dhis dhis2 Return to your session by invoking exit You now have a PostgreSQL user called dhis and a database called dhis2 . The PostGIS extension is needed for several GIS/mapping features to work. DHIS 2 will attempt to install the PostGIS extension during startup. If the DHIS 2 database user does not have permission to create extensions you can create it from the console using the postgres user with the following commands: sudo -u postgres psql -c "create extension postgis;" dhis
5.6 Database configuration
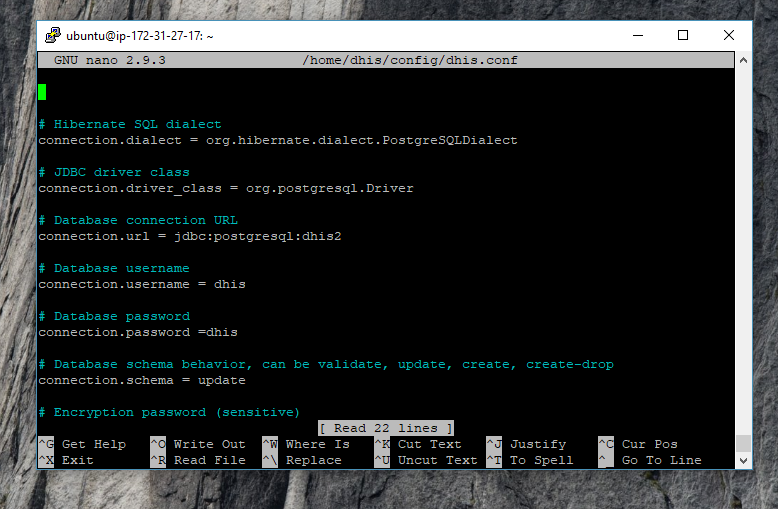
The database connection information is provided to DHIS2 through a configuration file called dhis.conf . Create this file and save it in the DHIS2_HOME directory. As an example this location could be:sudo -u dhis nano /home/dhis/config/dhis.conf A configuration file for PostgreSQL corresponding to the above setup has these properties: # Hibernate SQL dialect connection.dialect = org.hibernate.dialect.PostgreSQLDialect # JDBC driver class connection.driver_class = org.postgresql.Driver # Database connection URL connection.url = jdbc:postgresql:dhis2 # Database username connection.username = dhis # Database password connection.password = xxxx # Database schema behavior, can be validate, update, create, create-drop connection.schema = update # Encryption password (sensitive) encryption.password = xxxx
connection.password = ${DB_PASSWD}
A common mistake is to have a white-space after the last property value so make sure there is no white-space at the end of any line. Also remember that this file contains the clear text password for your DHIS2 database so it needs to be protected from unauthorized access. To do this invoke the following command which ensures that only the dhis user which owns the file is allowed to read it:
chmod 0600 dhis.conf
5.7 Java installation :
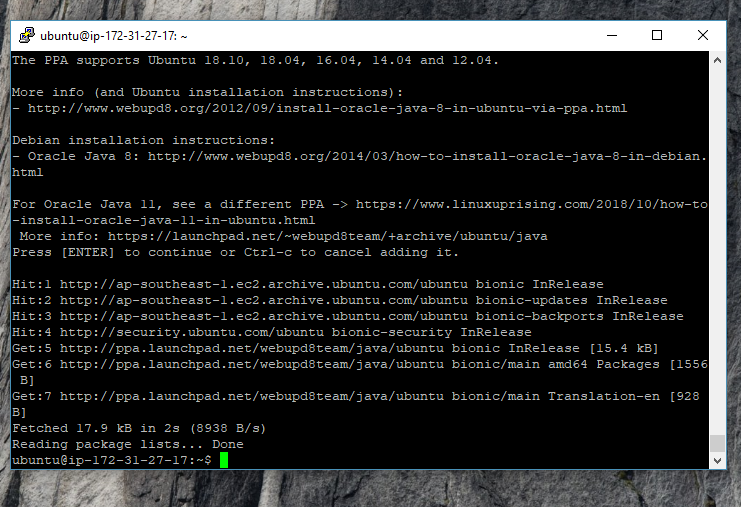
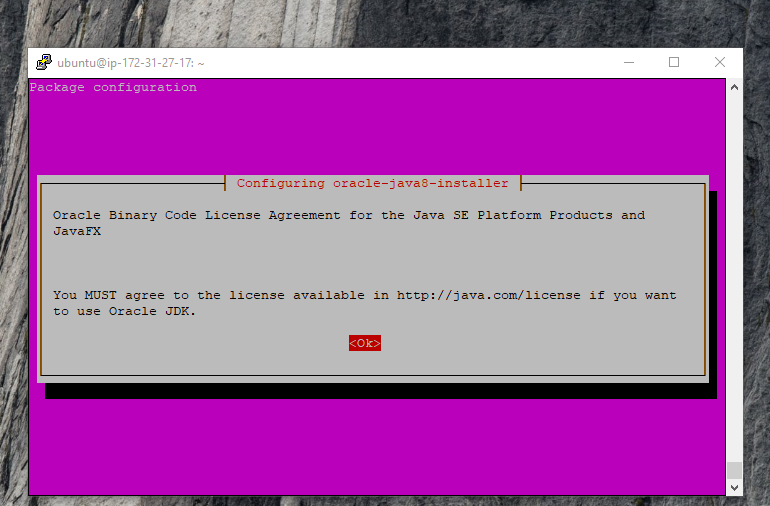
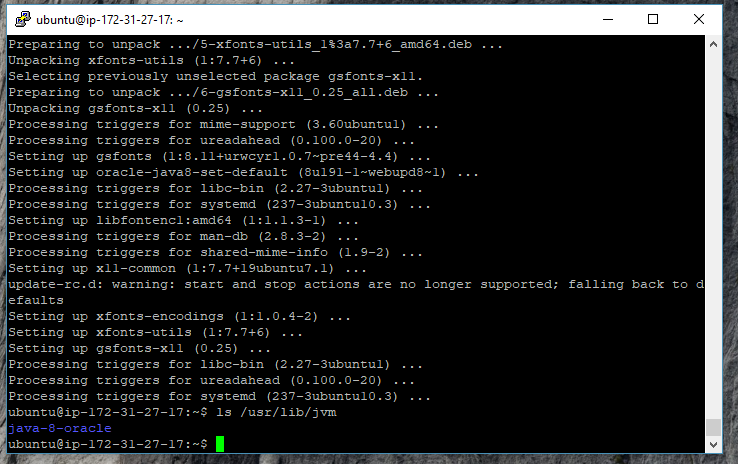
Oracle Java 8 JDK is recommended for DHIS2. To install it, add the repository by running the below command and pressing Enter when asked.sudo add-apt-repository ppa:webupd8team/javaThen run below commands:
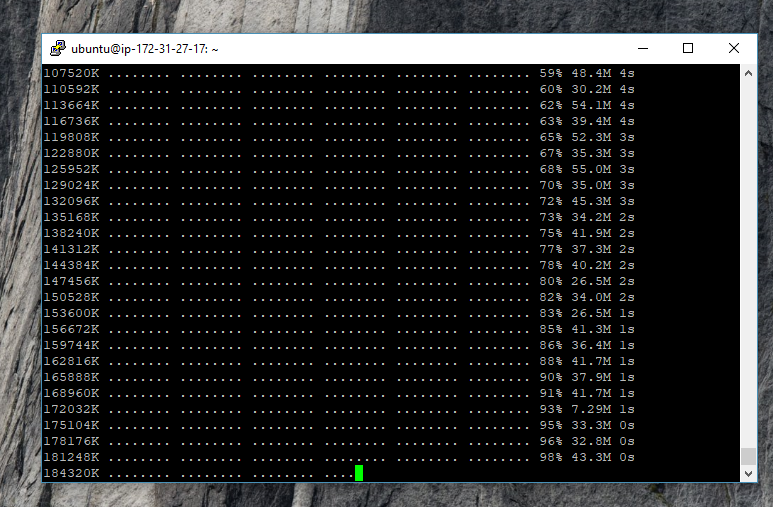
sudo apt-get update
sudo apt-get install oracle-java8-installer
ls /usr/lib/jvm
5.8 Tomcat and DHIS2 installation
sudo apt-get install tomcat8-user

To create a Tomcat instance for DHIS2 move to the dhis folder created above:

				cd /home/dhis/

				Create Tomcat instance:
				sudo tomcat8-instance-create tomcat-dhis

				Set ownership of the created folder to dhis user
				sudo chown -R dhis:dhis /home/dhis/tomcat-dhis/

				Edit setenv.sh:
				sudo nano /home/dhis/tomcat-dhis/bin/setenv.sh

				Add the following lines to the bottom of the file:

				export JAVA_HOME='/usr/lib/jvm/java-8-oracle/'
				export JAVA_OPTS='-Xmx2000m -Xms1000m'
				export DHIS2_HOME='/home/dhis/config'
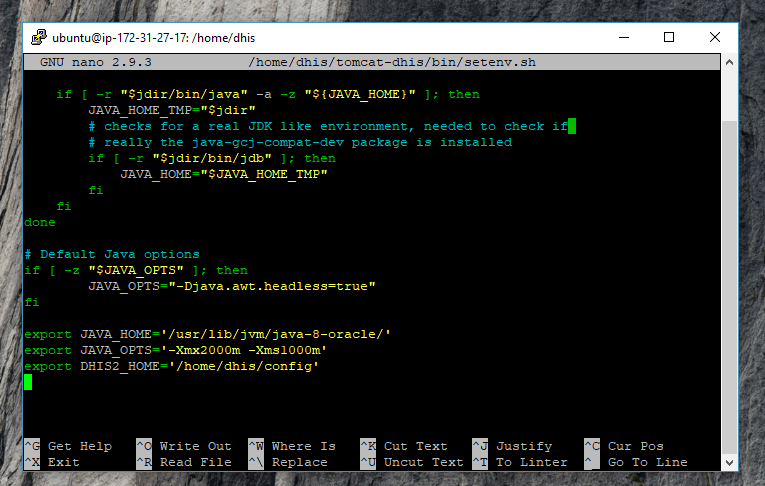
Please make sure the java installation directory matches the path given in JAVA_HOME above.
The next step is to download the DHIS2 WAR file and place it into the webapps directory of Tomcat:
sudo wget https://s3-eu-west-1.amazonaws.com/releases.dhis2.org/2.30/dhis.war

sudo mv dhis.war tomcat-dhis/webapps/ROOT.warDHIS2 should never be run as a privileged user, so edit the startup.sh:
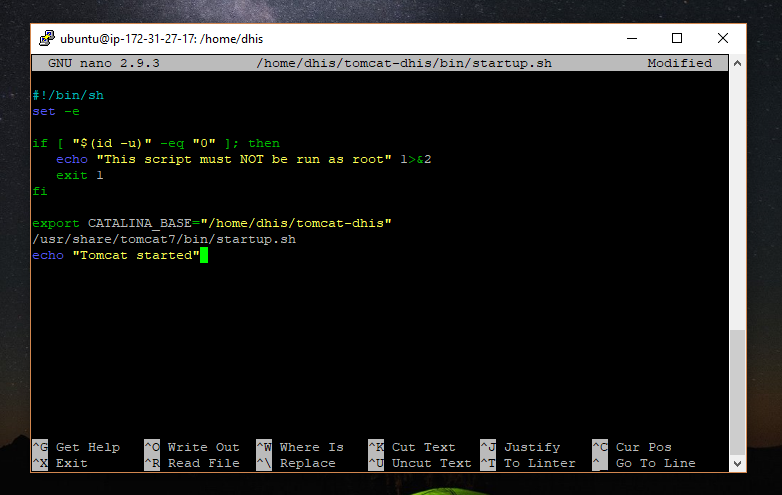
sudo nano /home/dhis/tomcat-dhis/bin/startup.shReplace everything in the file with the following lines:
#!/bin/sh
				set -e

				if [ "$(id -u)" -eq "0" ]; then
				   echo "This script must NOT be run as root" 1>&2
				   exit 1
				fi

				export CATALINA_BASE="/home/dhis/tomcat-dhis"
				/usr/share/tomcat7/bin/startup.sh
				echo "Tomcat started"
5.9 Running DHIS2 :
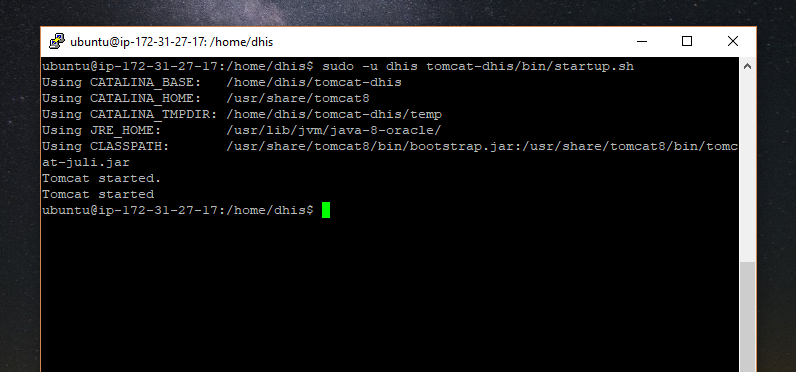
DHIS2 can now be started by invoking:sudo -u dhis tomcat-dhis/bin/startup.sh
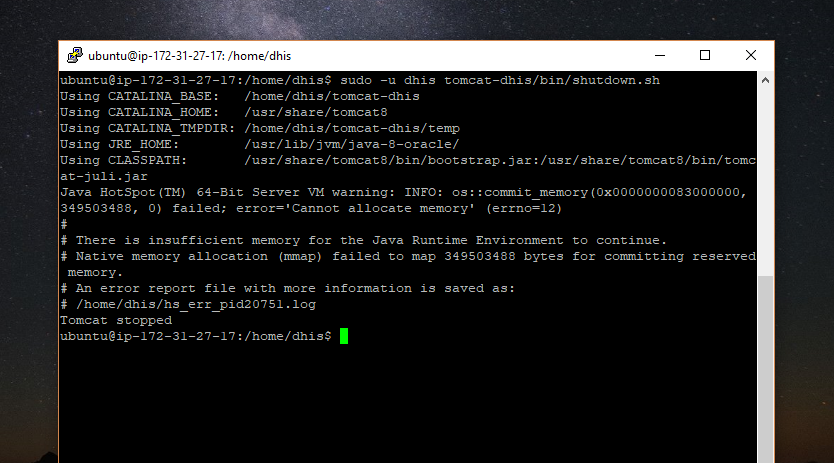
sudo -u dhis tomcat-dhis/bin/shutdown.sh
tail -f tomcat-dhis/logs/catalina.out
Assuming that the WAR file is called ROOT.war, you can now access your DHIS2 instance at the following URL:
http://my-server:8080/
Username: admin
Password: district
5.10 File store configuration Create init scripts:
sudo nano tomcatEnter the following lines:
					#!/bin/sh
					#Tomcat init script

					HOME=/home/dhis/tomcat-dhis/bin

					case $1 in
					start)
					   sudo -u dhis ${HOME}/startup.sh
					   ;;
					stop)
					   sudo -u dhis ${HOME}/shutdown.sh
					   ;;
					restart)
					   sudo -u dhis ${HOME}/shutdown.sh
					   sleep 5
					   sudo -u dhis ${HOME}/startup.sh
					   ;;
					esac
					exit 0
Move the script to the init script directory and make it executable by invoking:
sudo mv tomcat /etc/init.d
sudo chmod +x /etc/init.d/tomcat
Next make sure the tomcat init script will be invoked during system startup and shutdown:
sudo /usr/sbin/update-rc.d -f tomcat defaults 81
Enjoy the Day!!!
- Feel free to contact with me:
Mohammad Julhas Sujan
Cell: +8801989-442856
Email: julhaspustcse@gmail.com
Skype: julhas08
Outline
Server specifications:
Software requirements:
See detail:
https://docs.dhis2.org/master/en/implementer/html/dhis2_implementation_guide_full.html#installationCreate an account in Amazone AWS. Also, you can try with free EC2. For free, you need to add your credit card and they will charge $1 which is for verifying your information. This $1 is refundable.
See detail:
https://ap-southeast-1.console.aws.amazon.com3.1 Launch virtual machine
3.2 Choose an Amazone Machine Image (AMI):
3.3 Choose an Instance Type:
3.4 Configure Instance Details:
3.5 Add storage:
3.6 Configure Security Group:
3.7 Review Instance Launch:
3.8 EC2 Launching Status:
3.9 Launched Instance:
4.1 Connect your Linux instance:
4.2 Connect your linux instance from windows using putty:
Follow the below guidance:
https://docs.aws.amazon.com/AWSEC2/latest/UserGuide/putty.html4.3 In putty add the host name with default port 22
4.4 Under connection>> Click on Auth and load your private key that you have already generated by puttygen and finally click on the “Open” button:
4.5 See the terminal :
4.6 Login using Win-SCP: open your winscp and follow the below steps
4.7 Advanced settings in win-scp:
4.8 After login in win-scp:
5.1 Creating a user to run DHIS2:
You should create a dedicated user for running DHIS2. Under no circumstances, should you run the DHIS2 server as a privileged user such as root. Create a new user called dhis by invoking:sudo useradd -d /home/dhis -m dhis -s /bin/false
sudo passwd dhis
5.2 Creating the configuration directory :
Start by creating a suitable directory for the DHIS2 configuration files. This directory will also be used for apps, files and log files. An example directory could be:
mkdir /home/dhis/config
chown dhis:dhis /home/dhis/config
5.3 Setting server time zone and locale
It may be necessary to reconfigure the time zone of the server to match the time zone of the location which the DHIS2 server will be covering. If you are using a virtual private server, the default time zone may not correspond to the time zone of your DHIS2 location. You can easily reconfigure the time zone by invoking the below and following the instructions.sudo dpkg-reconfigure tzdata
5.4 PostgreSQL installation:
Install PostgreSQL by invoking:sudo apt-get update sudo apt-get install postgresql postgresql-contrib
See detail:
https://www.digitalocean.com/community/tutorials/how-to-install-and-use-postgresql-on-ubuntu-16-045.5 Install Postgis:
sudo apt-get install postgresql-10-postgis-2.4
Source:
https://packages.ubuntu.com/bionic/postgresql-10-postgis-2.4Create a non-privileged user called dhis by invoking: sudo -u postgres createuser -SDRP dhis Enter a secure password at the prompt. Create a database by invoking: sudo -u postgres createdb -O dhis dhis2 Return to your session by invoking exit You now have a PostgreSQL user called dhis and a database called dhis2 . The PostGIS extension is needed for several GIS/mapping features to work. DHIS 2 will attempt to install the PostGIS extension during startup. If the DHIS 2 database user does not have permission to create extensions you can create it from the console using the postgres user with the following commands: sudo -u postgres psql -c "create extension postgis;" dhis
5.6 Database configuration
The database connection information is provided to DHIS2 through a configuration file called dhis.conf . Create this file and save it in the DHIS2_HOME directory. As an example this location could be:sudo -u dhis nano /home/dhis/config/dhis.conf A configuration file for PostgreSQL corresponding to the above setup has these properties: # Hibernate SQL dialect connection.dialect = org.hibernate.dialect.PostgreSQLDialect # JDBC driver class connection.driver_class = org.postgresql.Driver # Database connection URL connection.url = jdbc:postgresql:dhis2 # Database username connection.username = dhis # Database password connection.password = xxxx # Database schema behavior, can be validate, update, create, create-drop connection.schema = update # Encryption password (sensitive) encryption.password = xxxx
connection.password = ${DB_PASSWD}
A common mistake is to have a white-space after the last property value so make sure there is no white-space at the end of any line. Also remember that this file contains the clear text password for your DHIS2 database so it needs to be protected from unauthorized access. To do this invoke the following command which ensures that only the dhis user which owns the file is allowed to read it:
chmod 0600 dhis.conf
5.7 Java installation :
Oracle Java 8 JDK is recommended for DHIS2. To install it, add the repository by running the below command and pressing Enter when asked.sudo add-apt-repository ppa:webupd8team/javaThen run below commands:
sudo apt-get update
sudo apt-get install oracle-java8-installer
ls /usr/lib/jvm
5.8 Tomcat and DHIS2 installation
sudo apt-get install tomcat8-user

To create a Tomcat instance for DHIS2 move to the dhis folder created above:

				cd /home/dhis/

				Create Tomcat instance:
				sudo tomcat8-instance-create tomcat-dhis

				Set ownership of the created folder to dhis user
				sudo chown -R dhis:dhis /home/dhis/tomcat-dhis/

				Edit setenv.sh:
				sudo nano /home/dhis/tomcat-dhis/bin/setenv.sh

				Add the following lines to the bottom of the file:

				export JAVA_HOME='/usr/lib/jvm/java-8-oracle/'
				export JAVA_OPTS='-Xmx2000m -Xms1000m'
				export DHIS2_HOME='/home/dhis/config'
Please make sure the java installation directory matches the path given in JAVA_HOME above.
The next step is to download the DHIS2 WAR file and place it into the webapps directory of Tomcat:
sudo wget https://s3-eu-west-1.amazonaws.com/releases.dhis2.org/2.30/dhis.war
sudo mv dhis.war tomcat-dhis/webapps/ROOT.warDHIS2 should never be run as a privileged user, so edit the startup.sh:
sudo nano /home/dhis/tomcat-dhis/bin/startup.shReplace everything in the file with the following lines:
#!/bin/sh
				set -e

				if [ "$(id -u)" -eq "0" ]; then
				   echo "This script must NOT be run as root" 1>&2
				   exit 1
				fi

				export CATALINA_BASE="/home/dhis/tomcat-dhis"
				/usr/share/tomcat7/bin/startup.sh
				echo "Tomcat started"
5.9 Running DHIS2 :
DHIS2 can now be started by invoking:sudo -u dhis tomcat-dhis/bin/startup.sh
sudo -u dhis tomcat-dhis/bin/shutdown.sh
tail -f tomcat-dhis/logs/catalina.out
Assuming that the WAR file is called ROOT.war, you can now access your DHIS2 instance at the following URL:
http://my-server:8080/
Username: admin
Password: district
5.10 File store configuration Create init scripts:
sudo nano tomcatEnter the following lines:
					#!/bin/sh
					#Tomcat init script

					HOME=/home/dhis/tomcat-dhis/bin

					case $1 in
					start)
					   sudo -u dhis ${HOME}/startup.sh
					   ;;
					stop)
					   sudo -u dhis ${HOME}/shutdown.sh
					   ;;
					restart)
					   sudo -u dhis ${HOME}/shutdown.sh
					   sleep 5
					   sudo -u dhis ${HOME}/startup.sh
					   ;;
					esac
					exit 0
Move the script to the init script directory and make it executable by invoking:
sudo mv tomcat /etc/init.d
sudo chmod +x /etc/init.d/tomcat
Next make sure the tomcat init script will be invoked during system startup and shutdown:
sudo /usr/sbin/update-rc.d -f tomcat defaults 81
Enjoy the Day!!!
- Feel free to contact with me:
Mohammad Julhas Sujan
Cell: +8801989-442856
Email: julhaspustcse@gmail.com
Skype: julhas08