ডাটা এলিমেন্ট এর বিস্তারিত
ডাটা এলিমেন্ট কি (What is data element?)
ডিএইচআইএস ২ তে র-ডাটা ক্যাপচার করার মাধ্যম ই হল ডাটা এলিমেন্ট। ডেটা উপাদানগুলি কিভাবে সিস্টেমে রেকর্ড করা হয় ডাটা এলিমেন্ট সেটিই সংজ্ঞায়িত করে। যেমন ম্যালেরিয়ার ক্ষেত্রে মোট ম্যালেরিয়ার সংখ্যা কত তা ম্যালেরিয়া নামক একটি ডাটা এলিমেন্ট রেকর্ড করে। শুধু এতটুকু সংজ্ঞা দিয়ে ডিএইচআইএস ২ তে ডাটা এলিমেন্ট এর বিস্তৃতি বুঝা মুশকিল তবে কাজ করতে গেলে এটি সম্পর্কে বিস্তারিত জানা যাবে।
ডাটা এলিমেন্ট দেখাঃ
ডাটা এলিমেন্ট এক্সেস করার জন্য আপনাকে নীচের লিংক কে যেতে হবেঃ Apps- > Data Elements – > All
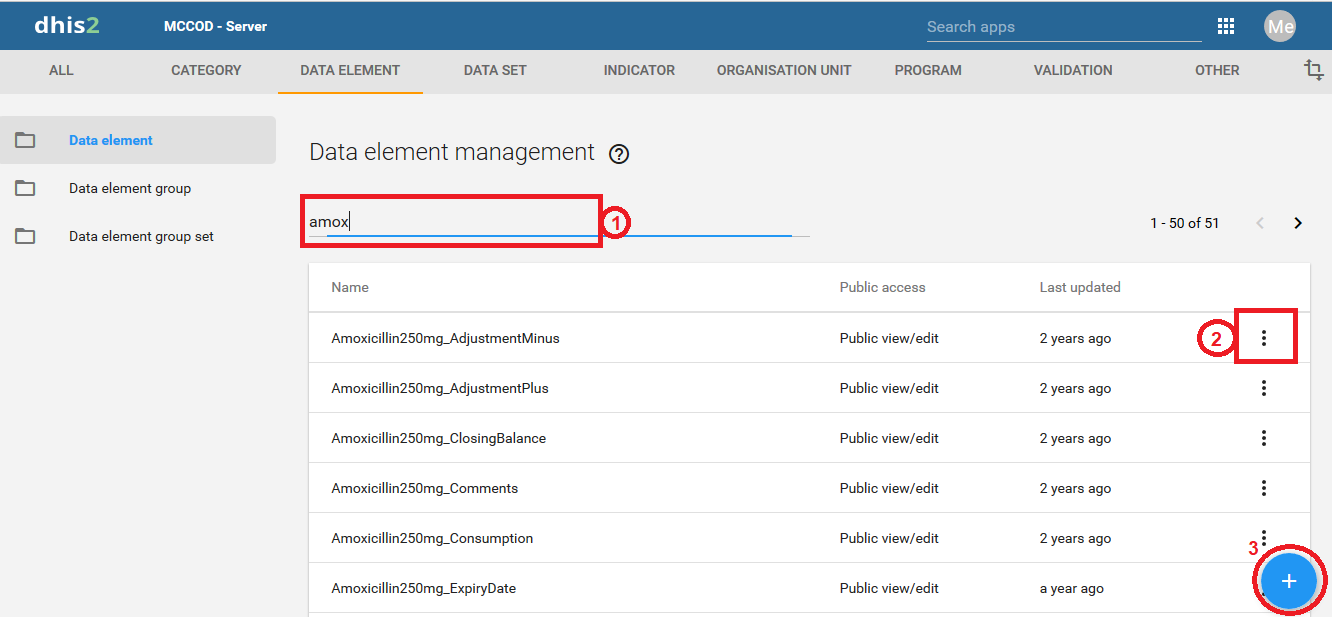
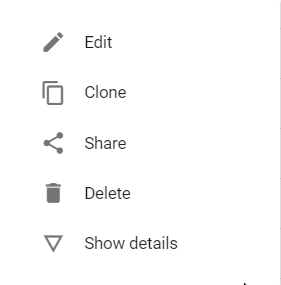
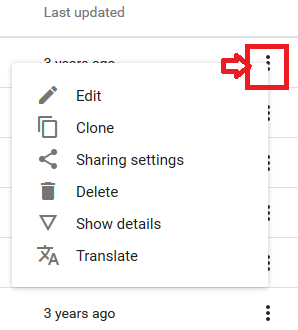
এবার এখান থেকে ১নং এর মত ‘Search by name’ এ আপনি আগের কোন ডাটা এলিমেন্ট এর নাম লিখলে আপনাকে লিস্ট আকারে তা দেখাবে। এবার ২নং এ ক্লিক করলে আপনাকে নীচের মত অনেক গুলো অপশন দেখাবে। এখান থেকে আপনি এলিমেন্ট টি এডিট, ডিলিট, শেয়ার ও বিস্তারিত দেখতে পাবেন। এখানে ক্লোন নামে আর একটি লিংক আছে যার মাধ্যমে আপনি এই এলিমেন্টটির মত হুবহু এলিমেন্ট তৈরি করেতে পারবেন।
এবার বিস্তারিত লিংক এ ক্লিক করলে নীচের মত ডাটা এলিমেন্ট টির সংক্ষিপ্ত নাম, বিস্তারিত, কবে তৈরি করা হয়েছে, শেষ কবে আপডেট করা হয়েছে, এর ইউনিক আইডি ও লিংকটি দেখাবে। এখানে ইউনিক আইডি টি বেশ গুরুত্বপূর্ণ। এটি মূলত ১১ টি ক্যারেকটার এর সমন্বয়ে অটো তৈরি হয়। আর এই আইডি টিই মূলত ডাটাবেস এ ডাটা সেভ করে।

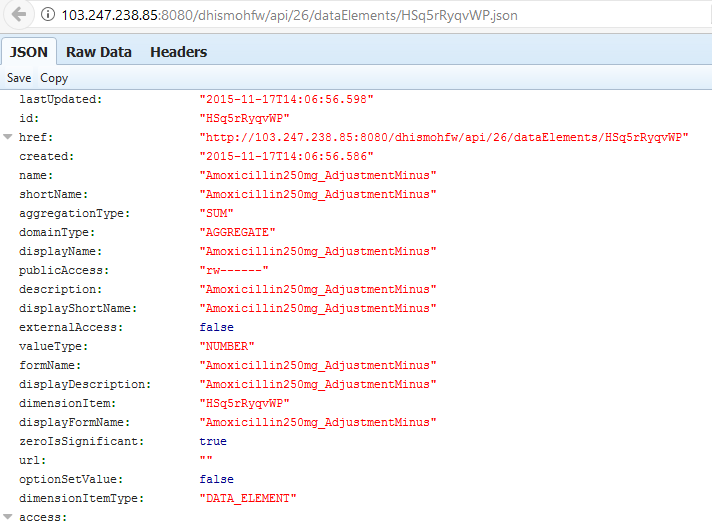
Api URL নামে একটি লিংক আছে। আপনি এই লিংক এ ক্লিক করলে আপনাকে নীচের মত করে এই এলিমেন্ট এর বিস্তারিত দেখাবে। এখানে আমি জেসন (JSON) ফরম্যাট এ দেখাচ্ছি। এটি আপনার প্রয়োজন হতে পারে আপনি যদি API এর মাধ্যমে এই এলিমেন্ট টির বিস্তারিত জানতে চান অথবা অন্য কোথাও এই তথ্য ব্যবহার করতে চান।
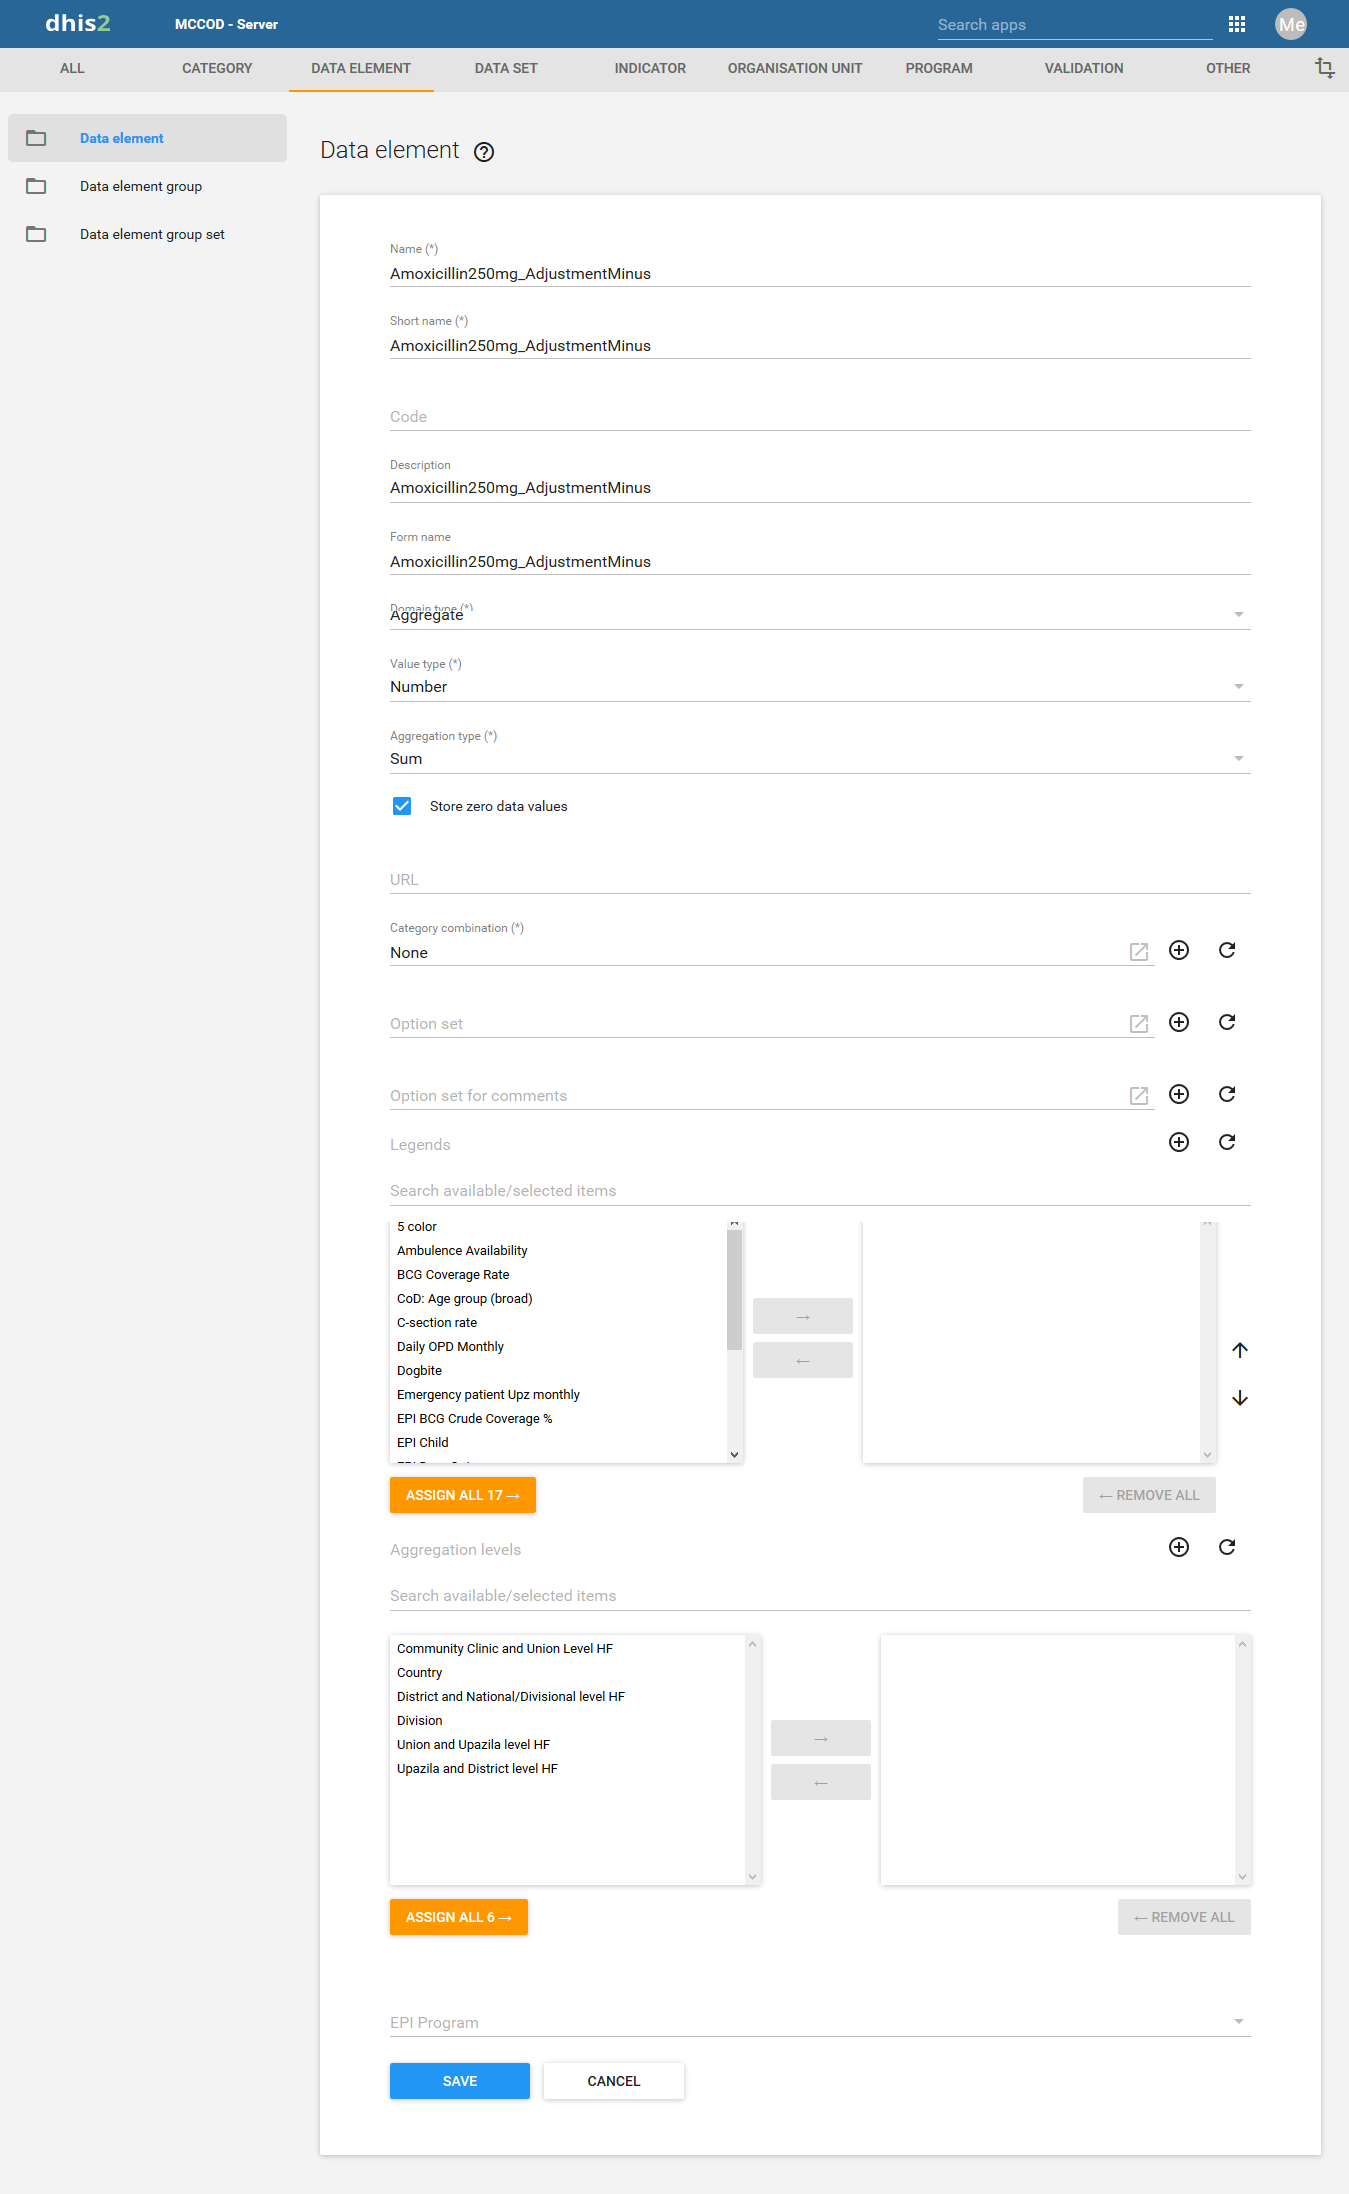
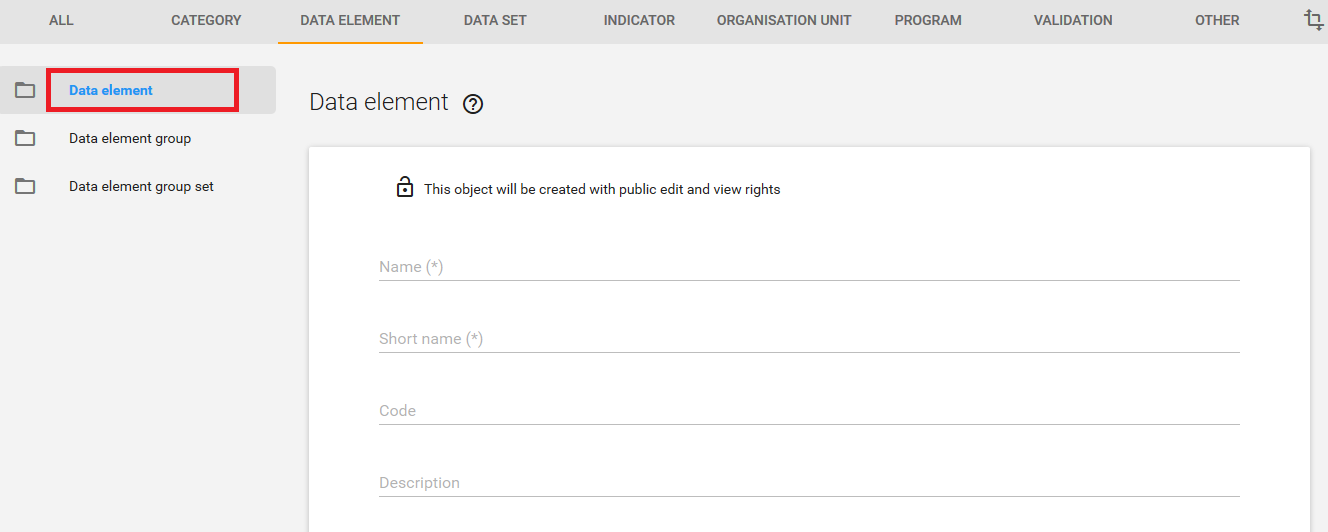
| Name | Define the precise name of the data element in this field. Each data element must have a unique name |
| Short name | Typically, an abbreviation of the full data element name. This attribute is often used in reports to display the name of the data element, where there is limited space available |
| Code | In many countries, data elements are assigned a code. This code can be entered in this field |
| Description | Allows a full textual description of the data element to be entered. The user should be as precise as possible, and include full information on how the data element is measured and what its meaning is |
| Form name | This allows you to provide an alternative name that can be used in either section or automatic data entry forms. The form name will be applied automatically |
| Domain type | Defines whether a data element is an aggregate or tracker type of data element. |
| Value type |
|
| Aggregation type |
|
| Store zero data values | By default, DHIS2 will not store zeros which are entered in the data entry module. If zeros need to be saved for a particular reason, this option can be set to “Yes”. |
| URL | A URL having an in-depth description of the data element can be entered in the ‘URL’ field. This could be for instance, a link to a metadata repository or registry that contains detailed technical information about the definition and measurement of the data element |
| Category combination | Defines which category combination the data element should have, also known as the “disaggregation”. |
| Option set for data values | Option sets are predefined lists of options which can be used in data entry |
| Option set for comments | Option sets for comments are predefined list of options which can be used to specify standardized comments for data values in data entry |
| Legend set | Legend sets can be used in the GIS module to display certain data elements with certain icons. Refer to the GIS module documentation for more information on legend sets. |
| Aggregation levels | The Aggregation Levels option allows the data element to be aggregated at one or more levels. When the user clicks on the Aggregation levels option, a drop down menu appears which displays available aggregation levels. The desired aggregation level is then selected by clicking the ‘Add Selected’ button. By default, the aggregation will start at the lowest assigned organisation unit. |
| Attributes | This section is only applicable if attributes have been defined in Data Adminisrtation -> Attributes. As an example “Classification,” “Collection Method,” “Rationale” and “Unit of measure” are all data element attributes and are discussed below. |
| Data element group sets | Data element group sets are only applicable if they have been defined. If data element group sets have been defined, each will appear in the “Data element groups” section. Select each data element group from the list of group sets provided. Groups can be selected based on if the data element is of aggregate or tracker type. |
ডাটা এলিমেন্ট তৈরি করা
ধাপ-১ ডাটা এলিমেন্ট তৈরি করার জন্য প্রথমে আপনাকে Apps >> Maintenance এ যেতে হবে।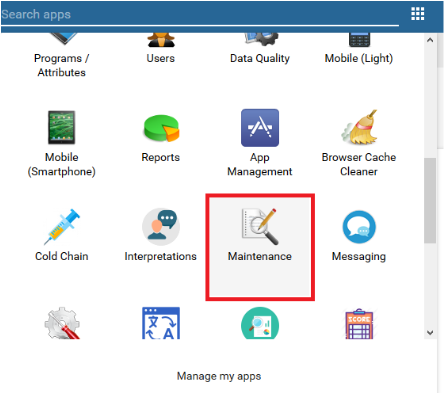

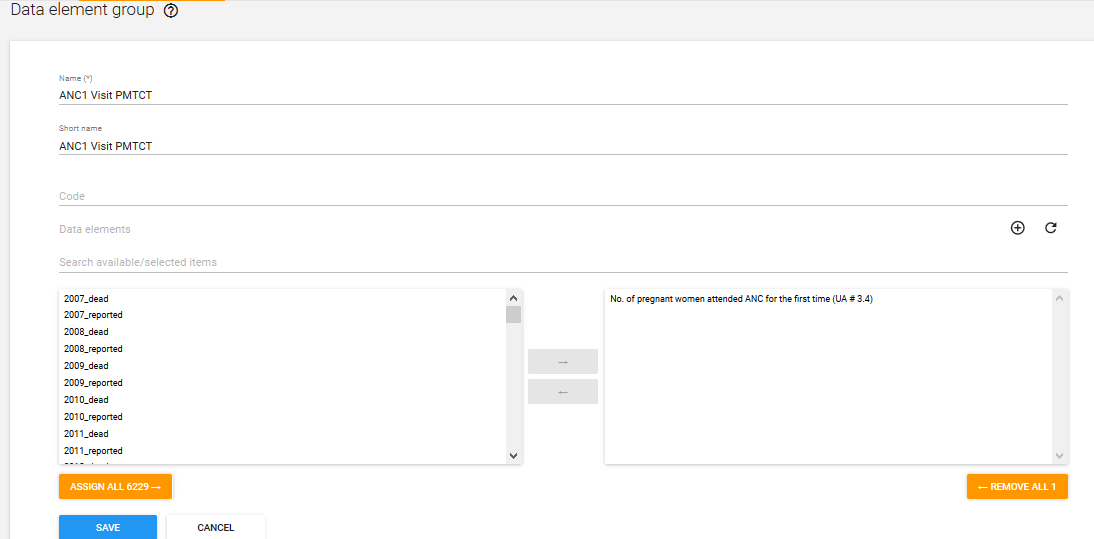
ডাটা এলিমেন্ট গ্রুপ
আপনার তৈরি কৃত একাধিক ডাটা এলিমেন্ট কে একত্রে একটি ডাটা এলিমেন্ট গ্রুপ তৈরি করতে পারেন। যেমন “Measles immunisation” and “BCG Immunisation” মিলে আপনি একটি গ্রুপ “Childhood immunisation” করতে পারেন।ডাটা এলিমেন্ট গ্রুপ তৈরি করা
ডাটা এলিমেন্ট গ্রুপ তৈরি করার জন্য আপনাকে নীচের ১নং লিংক এ ক্লিক করতে হবে। এখানে ক্লিক করলে নীচের মত সকল ডাটা এলিমেন্ট গ্রুপ সমূহ দেখতে পারবেন।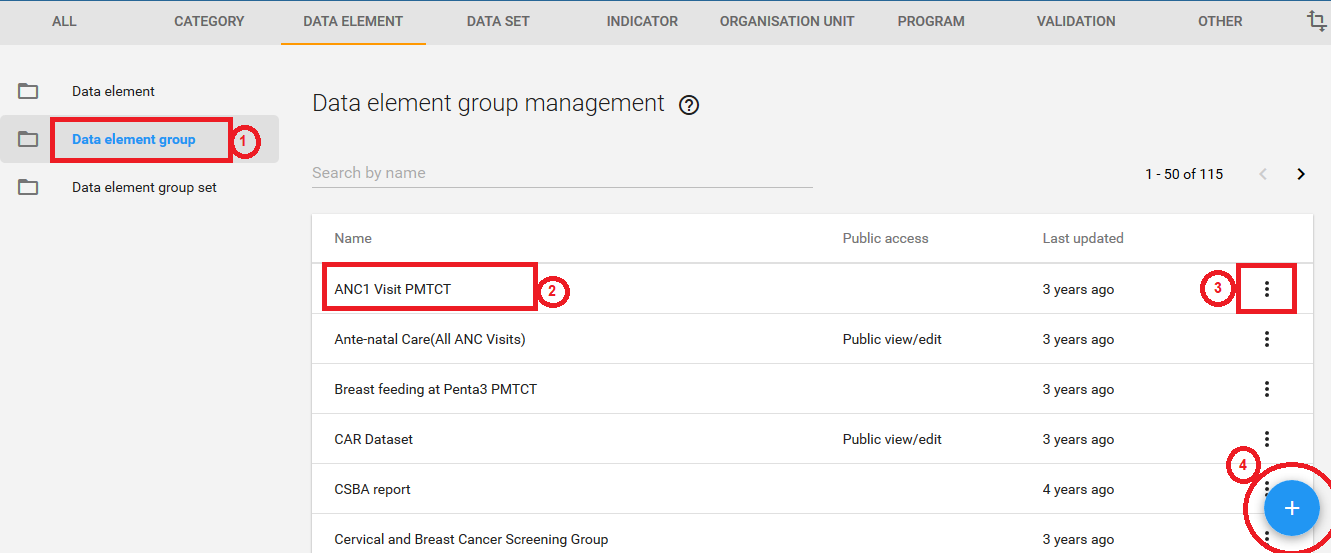
ডাটা এলিমেন্ট কি (What is data element?)
ডিএইচআইএস ২ তে র-ডাটা ক্যাপচার করার মাধ্যম ই হল ডাটা এলিমেন্ট। ডেটা উপাদানগুলি কিভাবে সিস্টেমে রেকর্ড করা হয় ডাটা এলিমেন্ট সেটিই সংজ্ঞায়িত করে। যেমন ম্যালেরিয়ার ক্ষেত্রে মোট ম্যালেরিয়ার সংখ্যা কত তা ম্যালেরিয়া নামক একটি ডাটা এলিমেন্ট রেকর্ড করে। শুধু এতটুকু সংজ্ঞা দিয়ে ডিএইচআইএস ২ তে ডাটা এলিমেন্ট এর বিস্তৃতি বুঝা মুশকিল তবে কাজ করতে গেলে এটি সম্পর্কে বিস্তারিত জানা যাবে।
ডাটা এলিমেন্ট দেখাঃ
ডাটা এলিমেন্ট এক্সেস করার জন্য আপনাকে নীচের লিংক কে যেতে হবেঃ Apps- > Data Elements – > All
এবার এখান থেকে ১নং এর মত ‘Search by name’ এ আপনি আগের কোন ডাটা এলিমেন্ট এর নাম লিখলে আপনাকে লিস্ট আকারে তা দেখাবে। এবার ২নং এ ক্লিক করলে আপনাকে নীচের মত অনেক গুলো অপশন দেখাবে। এখান থেকে আপনি এলিমেন্ট টি এডিট, ডিলিট, শেয়ার ও বিস্তারিত দেখতে পাবেন। এখানে ক্লোন নামে আর একটি লিংক আছে যার মাধ্যমে আপনি এই এলিমেন্টটির মত হুবহু এলিমেন্ট তৈরি করেতে পারবেন।
এবার বিস্তারিত লিংক এ ক্লিক করলে নীচের মত ডাটা এলিমেন্ট টির সংক্ষিপ্ত নাম, বিস্তারিত, কবে তৈরি করা হয়েছে, শেষ কবে আপডেট করা হয়েছে, এর ইউনিক আইডি ও লিংকটি দেখাবে। এখানে ইউনিক আইডি টি বেশ গুরুত্বপূর্ণ। এটি মূলত ১১ টি ক্যারেকটার এর সমন্বয়ে অটো তৈরি হয়। আর এই আইডি টিই মূলত ডাটাবেস এ ডাটা সেভ করে।
Api URL নামে একটি লিংক আছে। আপনি এই লিংক এ ক্লিক করলে আপনাকে নীচের মত করে এই এলিমেন্ট এর বিস্তারিত দেখাবে। এখানে আমি জেসন (JSON) ফরম্যাট এ দেখাচ্ছি। এটি আপনার প্রয়োজন হতে পারে আপনি যদি API এর মাধ্যমে এই এলিমেন্ট টির বিস্তারিত জানতে চান অথবা অন্য কোথাও এই তথ্য ব্যবহার করতে চান।
| Name | Define the precise name of the data element in this field. Each data element must have a unique name |
| Short name | Typically, an abbreviation of the full data element name. This attribute is often used in reports to display the name of the data element, where there is limited space available |
| Code | In many countries, data elements are assigned a code. This code can be entered in this field |
| Description | Allows a full textual description of the data element to be entered. The user should be as precise as possible, and include full information on how the data element is measured and what its meaning is |
| Form name | This allows you to provide an alternative name that can be used in either section or automatic data entry forms. The form name will be applied automatically |
| Domain type | Defines whether a data element is an aggregate or tracker type of data element. |
| Value type |
|
| Aggregation type |
|
| Store zero data values | By default, DHIS2 will not store zeros which are entered in the data entry module. If zeros need to be saved for a particular reason, this option can be set to “Yes”. |
| URL | A URL having an in-depth description of the data element can be entered in the ‘URL’ field. This could be for instance, a link to a metadata repository or registry that contains detailed technical information about the definition and measurement of the data element |
| Category combination | Defines which category combination the data element should have, also known as the “disaggregation”. |
| Option set for data values | Option sets are predefined lists of options which can be used in data entry |
| Option set for comments | Option sets for comments are predefined list of options which can be used to specify standardized comments for data values in data entry |
| Legend set | Legend sets can be used in the GIS module to display certain data elements with certain icons. Refer to the GIS module documentation for more information on legend sets. |
| Aggregation levels | The Aggregation Levels option allows the data element to be aggregated at one or more levels. When the user clicks on the Aggregation levels option, a drop down menu appears which displays available aggregation levels. The desired aggregation level is then selected by clicking the ‘Add Selected’ button. By default, the aggregation will start at the lowest assigned organisation unit. |
| Attributes | This section is only applicable if attributes have been defined in Data Adminisrtation -> Attributes. As an example “Classification,” “Collection Method,” “Rationale” and “Unit of measure” are all data element attributes and are discussed below. |
| Data element group sets | Data element group sets are only applicable if they have been defined. If data element group sets have been defined, each will appear in the “Data element groups” section. Select each data element group from the list of group sets provided. Groups can be selected based on if the data element is of aggregate or tracker type. |
ডাটা এলিমেন্ট তৈরি করা
ধাপ-১ ডাটা এলিমেন্ট তৈরি করার জন্য প্রথমে আপনাকে Apps >> Maintenance এ যেতে হবে।
ডাটা এলিমেন্ট গ্রুপ
আপনার তৈরি কৃত একাধিক ডাটা এলিমেন্ট কে একত্রে একটি ডাটা এলিমেন্ট গ্রুপ তৈরি করতে পারেন। যেমন “Measles immunisation” and “BCG Immunisation” মিলে আপনি একটি গ্রুপ “Childhood immunisation” করতে পারেন।ডাটা এলিমেন্ট গ্রুপ তৈরি করা
ডাটা এলিমেন্ট গ্রুপ তৈরি করার জন্য আপনাকে নীচের ১নং লিংক এ ক্লিক করতে হবে। এখানে ক্লিক করলে নীচের মত সকল ডাটা এলিমেন্ট গ্রুপ সমূহ দেখতে পারবেন।